Marfy sew along 1756 Pt 11 - Stay tapes and roll lines..
Stay tapes
Stay tape is an essential part of custom tailoring.
Not only does it stabilize the seams of a garment, and stop fabric from stretching out over time , but it also helps define them for a crisp and clean finish.
Unfortunately, which ever method you choose will take some time, but I promise its worth it...it's the small additions like these that take a jacket from nice to amazing.
Ideally, the tape you are using will be between 1/2" and 3/8" wide, made of pure cotton and pre-treated for shrinkage. If your's is slightly wider, thats fine (just don't cut it...it will fray terribly! )
*and just a quick reminder, the tailored example pictures will look a little different from our final fronts because of our included collar*
Also in a few examples below, I double my thread as my boucle is lofty...if you are using a light wool or similar, use a single thread only.
CUSTOM TAILORED
jacket images courtesy of www.cutterandtailor.com
Today, we are going to sew our stay tape to both the outside seam and the roll line... I'm using a lot of contrasting colours and different size tapes for clearer examples...yours will look much nicer!
I like to begin with my outer seam first.
Your tape should be placed with the outer edge laying right next to your thread tracing lines...the excess will fall back onto your hair canvas.
and it should start just under the roll line, pin the entire length every 2" being very careful not to pull your tape as you work down towards the hem.
(Mine does fall over the pad stitch as I am using a thicker tape…if your does the same, its fine! )
When you reach the bottom , cut the tape in a clean straight line right before the hem.
Sewing the tape to the outer edge
You have a couple of options here, you can either catch stitch both sides using a knotted length of cotton or use a running stitch - (start at the roll line, sew down to the hem on one side and then turn your fabric and head up the other side - finishing at the roll line again..)
and again only pick up tiny threads of the fabric, these stitches should remain invisible on the outside..
Either will work well.....sewers choice!
Even with just a few pins holding the fold, you can see how crisp that seam is!
MACHINE TAILORED
A machine stitched jacket is a lot faster to make than a custom, as although it does still include some hand stitching, its minimal.
Measure in on your hair canvas about 1/2” and draw a quick line from the roll line to the hem…
Place your tape onto your hair canvas, lining the edge of your tape with the edge of this line and leave the remainder hanging over the edge.
Again, here you have a couple of options for stitching.
A 2.5 zig zag stich is my favorite as it brings some flexibility to the tape and canvas….each part of your jacket should retain as much movement as possible for it to fit you well…
A 3.0 running stitch will also work well, but only use one single line from roll line to hem, adding a second could cause the tape to become stiff and rigid..
Now we can attach the canvas to the fashion fabric by placing the WS to the WS....
Use as few pins as possible to join the two fabrics together,
Gently pick your up front panels, and turn them to the right side or better still pin them to a dress from...check if there are gathers, lumps or bumps. If there is, re-pin the hair canvas until both are laying smoothly.
Again, the hair canvas needs to have a slight ease to it, and match the flexible nature of the fabric...don't pin it to tight!
Use a single thread of cotton to baste a running stitch just past your thread basting (or seam allowance) so that these stitches are kept on the outside of the final seams.
The tape will be caught in the seam when the facings are sewn which will secure it nicely.....
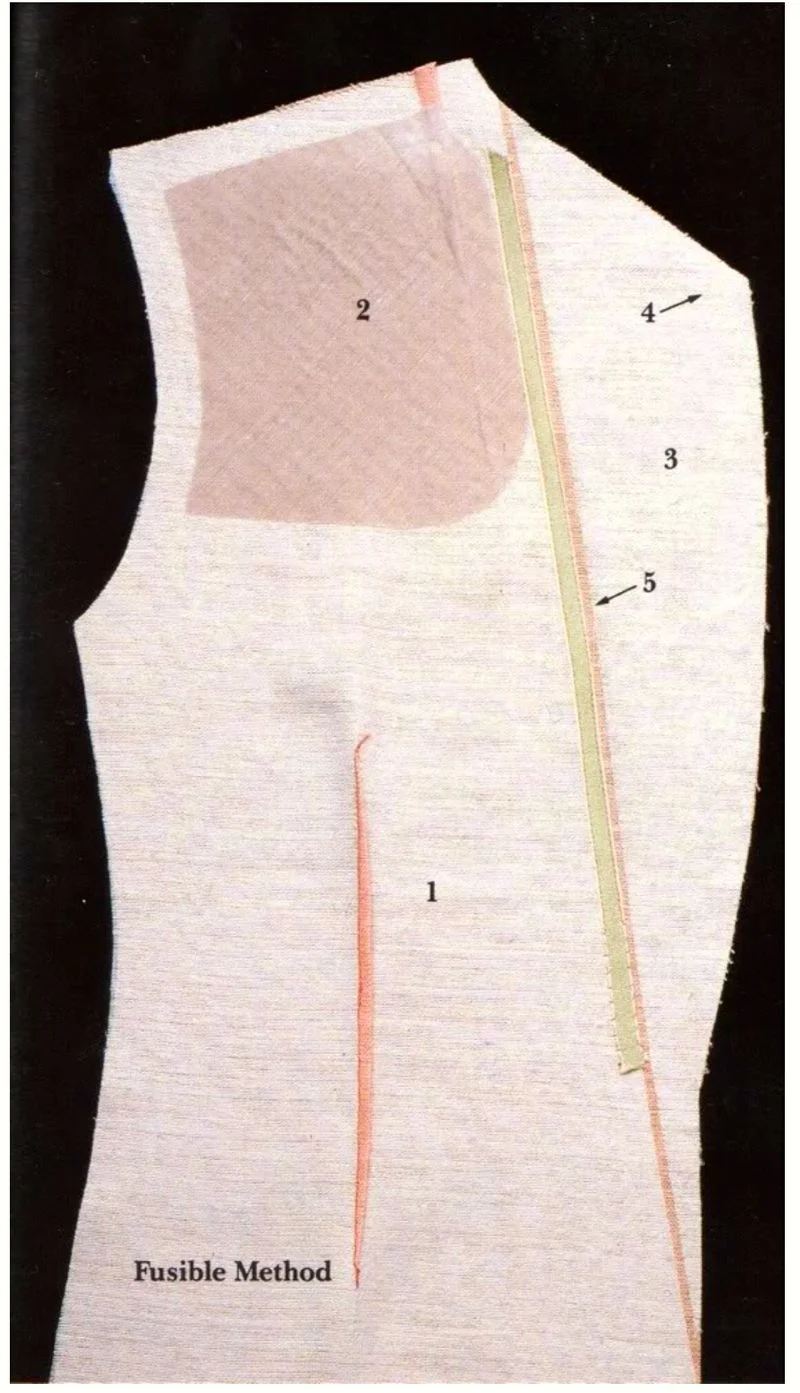
FUSIBLE TAILORING
While there is no tape shown in the picture above, if this is a stage you would like to include, just follow the custom tailoring directions...
A 1/2" wide tape will be better as there will be less bulk...also, it will have to be sewn by hand, but it would work really nicely if you are tempted to try some needle work...
SEAM FINISHING
If you are using the custom or machine sewn method, its a nice idea here to run some catch stitches along the shoulder area and the armseye extension....this will help keep the canvas firm and the shoulder reinforcement supported when you start to assemble your jacket.
ROLL (BREAK) LINE TAPE
Custom tailoring
I'm using a 1/2" stay tape to show my roll line as its much easier to see, but if you do have 1/4" tape available then use that instead..
To begin, measure the exact length of your roll line...mine is 5 1/2".
Portions (or all) of a collar are usually on bias, so the secret to a nice roll line is to shorten your tape.......usually 1/4 to 1/2" is sufficient.
The shorter length helps pull up the weight of the main panel and will also stop the bias sections from stretching and sagging over time.
I like to cut my tape before I start pinning so that I can see exactly what I am working with...in this instance 5" exactly.
Pin your tape tightly at both the beginning and end of your roll line under the collar line...
It should look like the picture above...
Now start to distribute the excess of your roll line along the tape, pin the middle first and then half way between the two and so on and so on...
Add as many pins as necessary to even out the tape to the roll line until its as flat as possible. You will see your canvas almost drawing up, thats exactly what you are after.
Using a double threaded knotted cotton, sew small catch stitches along the top and then the bottom of the tape... keeping the tape as flat as possible and continually adjusting as necessary. It should be perfectly flat when finished.
MACHINE and FUSBILE TAILORING
Normally on a machine sewn roll line, two thirds of the tape is sewn with machine and the final quarter (the portion seen when wearing) is sewn by hand.
I've been playing around with this jacket and there are (maybe) some portions of the collar that won't be seen when you are wearing it, but I think its going to come down to personal style.
Because of that, I am going to suggest that a hand sewn collar would be a better choice regardless of which method you are using to sew this garment but if you are planning to pad stitch by machine, then feel free to follow the suggestions below...
Pin the tape as shown above....and then mark a line 3" down.
Machine sew using a 3.0 stitch to this line from the top on both sides..
(This is just an example, your canvas will be attached to your fashion fabric and you will be machine sewing through both layers)
Use a catch stitch to sew the final two inches, only picking up tiny portions of the wrong side of the wool, these stitches should not been seen if possible from the outside...
I think thats it!
Any questions? Hellochallengingsew@gmail.com (envelope icon at top right) or leave a comment :-)
Next up...Pad stitching and your collar..