Marfy sew along 1756 Pt 9 - Sewing corners and balancing darts...
*I just wanted to mention quickly before I begin, that Susan Khalje has changed the length of access for her video from one year to three*
Happy Monday everyone! :-(
Now that we have our interfacing's cut, we need to sew our front panels together so they become the same shape as our hair canvas or fusible....
and to do that, we first need to talk about that tricky corner that's included in the front bodice section.....
I've seen it called a few things over the years but most sewers refer to it as either a reverse corner or a inset corner.
But in essence, what we are doing is joining a inward corner to a outward corner...and that sounds a little more intimidating than it actually is..
Usually, this design feature is more common in a gusset, a yoke, a godet skirt or a shawl collar...so I admit to loving that Marfy included it here....its unexpected and interesting.
and happily as I was doing my usual search on the web for extra links, I came across a wonderful video which explains it perfectly...
It proved quite hard to show each stage clearly through photos, so do watch the video before you begin..I would also suggest a practice run or two, as once you cut that corner there is no going back!!!
Threads magazine - Sewing inset corners (video)
Claire Shaeffer also has a little section in her book Couture Sewing, she calls it a reverse corner, but her technique includes some fell stitching, which I'm not sure will really be strong enough for a front bodice intersection.
So, I'm going to show the method I have been using for a few years and hopefully between the pictures and the video it will make perfect sense ..but if not, let me know and I will add more pics..or do a video!
(Also, the Threads video mentions organdy as a reinforcement for the corner, but that is not something I have to hand, like most people I image... but I've used silk organza very successfully throughout the years and can recommend this)
SEWING INSET CORNERS
Begin by cutting a 4 x 4" square of organza on grain...
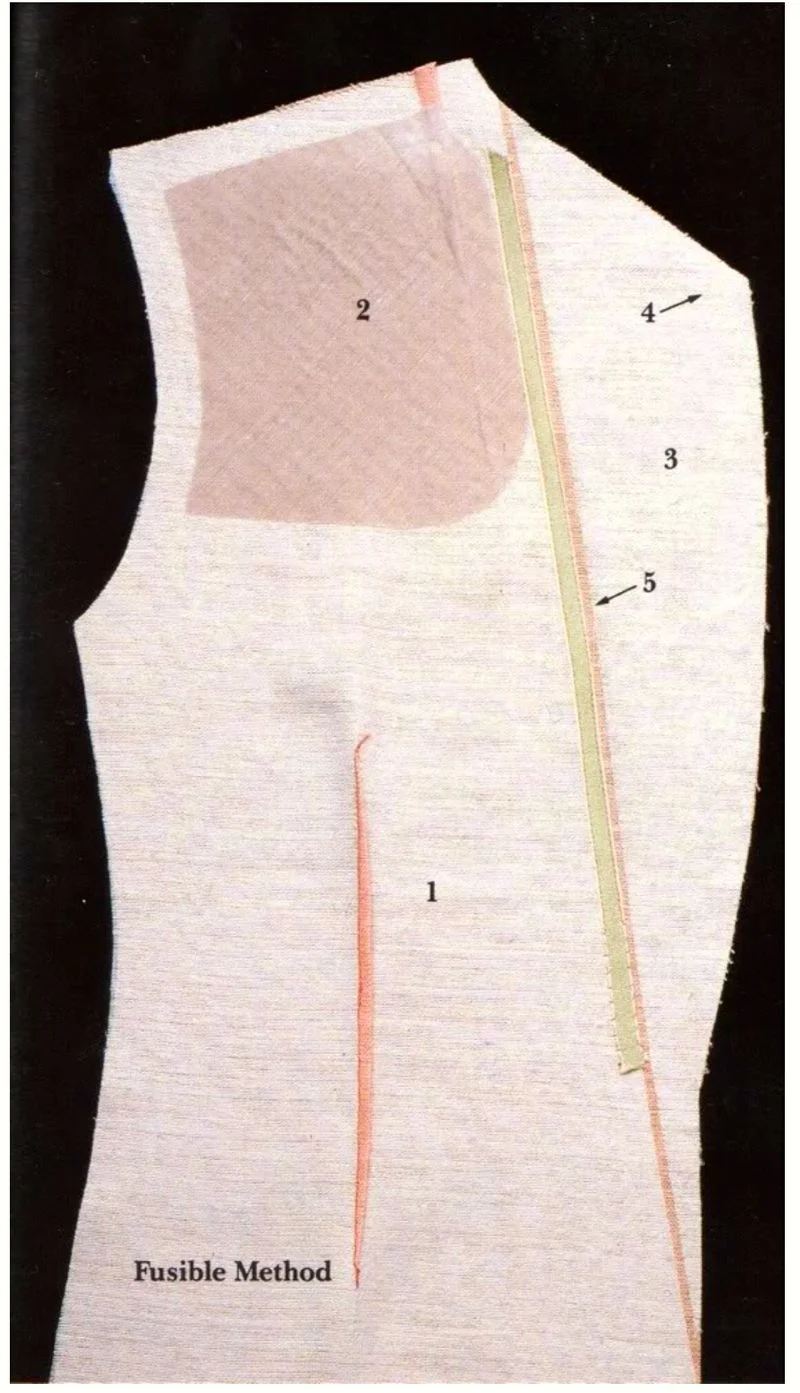
Place the organza over the inward corner on the right side of the fabric and hand baste the entire square following your thread basting or seam allowance... (red are thread traced seam allowances, yellow is basting for organza, white is machine stitching)
Machine stitch a 2.0 to 3.0 (depending on fabric bulk) length stitch in matching thread from the beginning of the organza to the end just outside of your seam line..(shown in black thread here)
If you are using a very fine fabric - use the square corner method as show in the video...
and using a sharp pair of scissors snip almost to the corner stitch...
Flip the organza to the wrong side and pin.... if your organza won't lay flat, just run a few basting stitches around to hold it
Then lay your outward corner directly onto your inward corner RS to RS matching thread tracing lines as you would sew a normal seam (we have really created just that by cutting the angled corner)
and sew just one side starting at the corner...taking one stitch down and back stitching once before sewing the entire seam.
and then repeat for the other side, starting at the corner again (unless you have a very fine fabric, if so follow the video square corner suggestion) back stitch once and then sew along the entire seam as normal...
When you flip it your right side should look similar to the one below.....remove your basting threads and give it a nice hot press...(over a ham with a press cloth!)
and as my jacket in a boucle , I will also add some catch stitches to the inside seams just to hold them neatly as the fabric is quite springy..
BALANCING DARTS
I know some of you are following along but using different patterns, so for those of you who are making a jacket that includes darts instead of princess seams , I did want to quickly cover something I think is fabulous! (easily amused I know!)
When you include a dart in a bulky or thicker fabric like a wool or boucle, the wrong side of the dart becomes quite heavy, and tends to almost fall to one side.
This can affect the way the jacket looks from the outside, as the dart can almost appear "off"
To stop this from happening, we need to do something called a balanced dart.
Threads has a nice tutorial here
and the always amazing Marina did a really interesting one here
To begin:
First... run a line of basting stitches down the entire stitch length of your fabric so the dart can be clearly seen.
Then cut a bias strip of either hair canvas or self fabric the length of your dart plus 2" and 2" wide. The fabric should be about the same weight as the fashion fabric so the two even each other out..
and using a regular sewing machine stitch, sew the two together.. (yellow thread)
Flip the underside of the new facing up and trim both sides down
Until they are a more manageable size....
and hot press the added fabric or hair canvas so it falls nicely to the other side...If it keeps flipping back up, run a quick basting stitch down the length of the attached fabric to hold it, while being pressed..
and press using a nice hot iron, some steam and a press cloth (check fabric can handle it first!!)
Trim your extra fabric to the same size as your dart fabric, and it should look just like this :-)
and from the right side you can just see that the two sides are now equally balanced, which will help the dart retain its shape which will of course, make your jacket front look even more gorgeous!
I'll be back on Wednesday to talk about pad stitching and Friday we will be finishing the roll line and hair canvas with our twill tape.
Any questions? Hellochallengingsew@gmail.com (envelope icon at top right) or leave a comment :-)
Happy Monday!
Leisa :-)