Blouse sew along Pt 3- Collar alternatives..
I think there is a fine line when altering a top with this style.....remove to much fabric and its a unflattering, tight shapeless mess, leave in to much and you have gathers and a collar and drape...
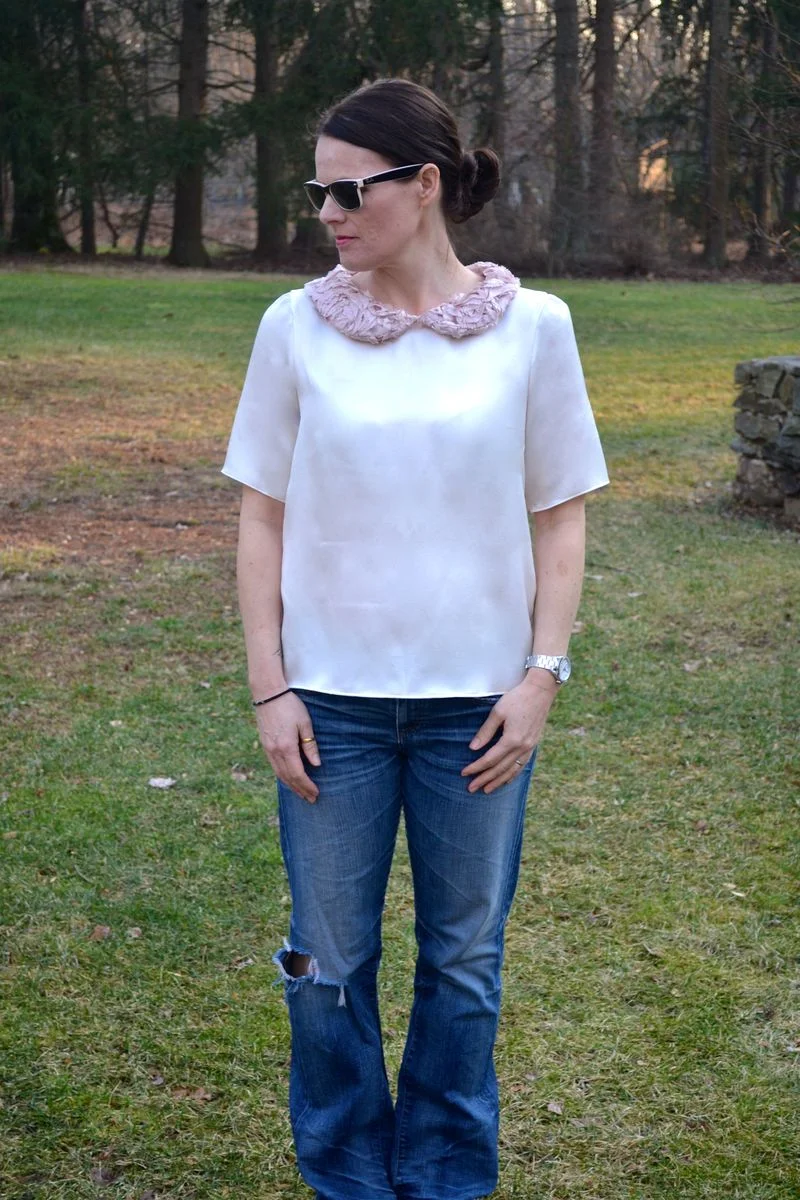
This kind of top just begs for skinny pants, ballet flats and a spring day....none of which was happening with our weather...but the possibilities are there...
ALTERATIONS
There are a few ways to change this up, you could take out all the excess and build in darts and /or style lines but at that point its probably easier to use another pattern as its become something so different anyway.
So this is the alternative, the quick fix...the down and dirty of alterations....
Of course it takes another muslin to get this right as it has to be fit tested a couple of times, but I think its worth it :-)
To begin, I went on a internet search for a great looking collar in a pdf format...and I kept coming back to this one by Christine Hayes, it has great style lines and soft rounded edges, I think its so lovely!
Its a big collar and the original blouse neck is high and small, so the first thing I did was drop the neckline by 1 1/2" to make it more of a scoop.
I then tried on the muslin and pinned out 4" from the center (2" from each fold) which left me with 2" of gathering fabric through out the front bodice, enough to skim my body without clinging to it in odd places. I will probably end up going back in to grade the waist a little, but I do like the relaxed feel of it a lot.
There are a couple of things I could have done here but the easiest by far is to change the angle of the shoulder line.
By pulling up the inside neckline edge of the shoulder, you can alter the fabric around the bust and neckline area, but not the shape or cut. It can't be a huge adjustment but a subtle one works well.
I find it easier and quicker to slip my muslin on and pin out the new shoulder line...as below...
and then its just a case of grading the back and front necklines to join.
Its a weird angle, sorry but they are equal, I kept it a 1/4" longer at the back for a little ease,
And of course as the front is scooped there is not need for a back opening.
So for the last time (I promise) my many coloured muslin master, black lines this time and the shoulder is marked 1 and 2, for the alteration......and I swear I do this to all my muslins, really really. I've learnt the hard way over the years, its so worth being this organized...at least in the sewing room :0
You may notice that some of the seam line for the sleeve pattern has been cut off, but becuase of the new angle on the shoulder seam I found I did not need to adjust it further....
If anything it fits better, kind of loving the sleeve all in all..
THE COLLAR PATTERN
I made a couple of quick adjustments to this but nothing major.
My neckline was shorter than the intended size for the collar so I reduced the fold by 1" making 2" total and took 1" of the width. The pattern has 5/8" already included...
Cut my gorgeous fabric twice...and sewed the two right side together and flipped them out.
Sewed the collar right side to wrong side encasing the neck seams and used tiny pick stiches along the neckline to hold it in place, its kind of pouffy!
I found this beauty in Mood last year, a scant one yard left, a tiny 30" wide .....worth every $$. Every top needs a little accent of Valentino!
I can't decide if it was hand sewn or machined on, its made up from pieces of scissor pinked silk, which are sewn to look like flowers onto a net.
All the thread is tucked under the top layer and can't be seen from the right side. Its pretty spectacular.
So hopefully for anyone sewing along , your muslin should be ready for Monday as we will be cutting fabric and discussing seam options and for all those who asked.... everything will stay up on the site, you can find it all in the menu at the top.
No need to sew with us, consider them a tutorial!
Wishing everyone a lovely weekend.
Leisa


