Some quilting thoughts...and one amazing jacket!
More pictures of Tracey's jacket towards the end.... scroll on down!
I started thinking last week about my first jacket class, and how foreign the entire quilting concept was .....quilt what to what? pin where? .. ....luckily I had Susan Khalje and a group of very experienced sewers around me , but if this is your first one and you (like me) had never actually seen or held a French Jacket before, I thought this could be useful....
I hope between Inna's fantastic chevrons and my simple straight lines you can find a style for your jacket that you love.
I have cut out my examples on beige boucle and lined it with white charmeuse, my black fabric is hard to photograph in detail... I choose to show a upper back sleeve (1 of the 3 piece) and a center front with princess seam as they both have different shapes which have to be considered when quilting.
Its so nice and straightforward , I download a show...make a coffee and enjoy the slow methodical process!
Once the basting is complete, remove your pattern pieces from the wool and put them to one side. Your single pieces should look like those below...(you can just make out the red basting thread)
Cut a large strip of scrap boucle and a similar size of lining and thread baste them together....20" or more in length on grain and four or five" wide...so that you can experiment with stitch and tension lengths and find one that works well with your fabrics.
I am using red in both upper and lower threads so you can see the stitches but you should use a colour that matches your wool for your upper thread and one that matches your lining for your bobbin.
After attaching the walking foot, pull the bobbin thread up so that you have both the upper and lower tails trailing behind the foot.
If you forget to do this when you start, your bobbin tail will get twisted up like the right side below. The tails are integral to the quilting, so make sure you have both!
And then play around, (your wool will always face you and your lining will remain hidden ) remember that wools are lofty, so a very large stitch (5) is not going to look as big as it would normally...but start with a 2.5 and move up in increments of .05 until you reach the maximum stitch length . I always start with my tension quite high at a 7 or more...it needs to have some give but not so much that you could pull the threads from the lining side, however all machines are different, so you could start yours on a regular tension and work it up with the stitch if you prefer!
You are ultimately looking for a stitch that beds slightly into the wool but does not sink in enough to start pulling the fabric with it, quilting not channels!
The upper row in the pictures are 2.5 and the bottom are a 5 stitch length.......when you are done put your samples on a dress form or table and stand back, can you see the stitch lines ? then they are too tight....increase stitch length and tension. My bottom line with a 5 length is perfect, in the right colour this would just disappear into the wool and lay nicely on the silk.
and don't panic that your lining starts to gather up and wrinkle, thats perfectly normal! a quick iron with a small amount of steam will sort that out...(before is above/after is below)
and if it won't iron smooth - as shown below- then the chances are you are on the cross grain in error! The quilting should run parallel to the selvedge, unless you are getting fancy and making squares or chevrons!!
When you are happy with your stitch, start marking up the actual pattern pieces.
Each pattern piece should be individually quilted, they will remain that way until the knots are tied and you are ready to baste.
and there are a few rules worth remembering....
Stay 1" in (or more) from the edge and leave 2" at the hem.
Have long tails when you begin to quilt a line ....pull out at least 6"of thread for each individual row, both top and bottom
Do not back tack, knotting the tails will secure the stitches.
and not to sound like anyones mother but if its your first time dare I suggest straight lines?, they look lovely and are nice and simple!
To start, measure 1" inside the thread tracing on the wool side and pin (I've shown it from the lining side but you will not have the pattern outline on yours...)
I'VE ADDED RED THREAD TRACING TO THE LINING SO YOU CAN SEE HOW I HAVE LAYED OUT THE QUILT LINES, IT SHOULD NOT BE THERE IN YOURS HOWEVER!
These will be your guidelines for quilting, the pins will be your first row and your last, now you just have to figure out what will fit inside. I've choose to do 1" straight lines so I just need to measure them out and pin along for a guide, of course you could do 1/2" or 2" or alternate....
There are lots of ways to mark your quilting lines for stitching, you can leave the pins in and remove them one by one as you follow the walking foot up each row, mark them with chalk , use Sarah's brilliant method or thread trace..I have tried lots of things but have eventually settled on thread tracing , for me its worth the small amount of time it takes and as a added bonus it keeps the two layers very firmly together until they are stitched.
Left to right..Chalkoner here Tailors chalk here Clover pens here
Mark as many big rows as you can and make then make little rows if there is enough room, three or more inches is good...but its your creation, you don't need many rows to secure your fabrics together..(.sometimes a sleeve with just have one, that fine!) ... but you can see on the upper right I was able to fit a short line in so I choose to do so.... the blue threads are the quilting lines
and for my sleeve, I was able to fit one long row and two short ones...the elbow section was to narrow for a complete line.
Its important to give yourself at least a inch all around becuase you will be folding your seam allowances into these gaps and you do not want to cut your fabric to short, as they fray...
and when you have them all marked, stitch away! There is every possibilty that one fabric will stretch a little more than the other.....totally expected! without the walking foot however it can be inches.
To allow for this shift, when you have quilted a piece, re-pin your amended muslin pattern back on to the quilted piece and re-mark the seam lines with new thread basting if necessary.
Both pictures below are of the finished quilt stitching. I have removed one blue guide line so that you can see (or not!) see the quilting sewn in... Also look closely at the lower lining picture, at one point in the middle the stitch gets caught in some metalic thread, if this was a bodice piece I would unpick it but as its a sleeve the lining will not be seen, this happens quite often if you have wool made up of many elements.
and once the quilting lines are finished and you are happy, its time to knot the tails....don't be surprised if this takes longer than you expect!!
Fold the wool back and using a pin pull both tails into the middle, so that nothing remains out the outside of either side ...and tie them together using at least a double knot.
Do the top's only and the little quilt lines that don't reach the bottom....the hem on the sleeve and jackets are liable to change so don't tie them off just yet and thats it...
Next Monday is basting and sleeve cutting for anyone who is using a fabric that needs matching..
and I know a lot of my French jacket class mates check in....please tell me if I have missed anything!!!
and speaking of class mates...
One of the nicest and more unexpected side benefits to attending a class in Baltimore are the people you meet, although we all head back to our own lives after that week, every now and again a email will appear with pictures of a finished garment, and we all start a email thread again. Its a lovely thing indeed.
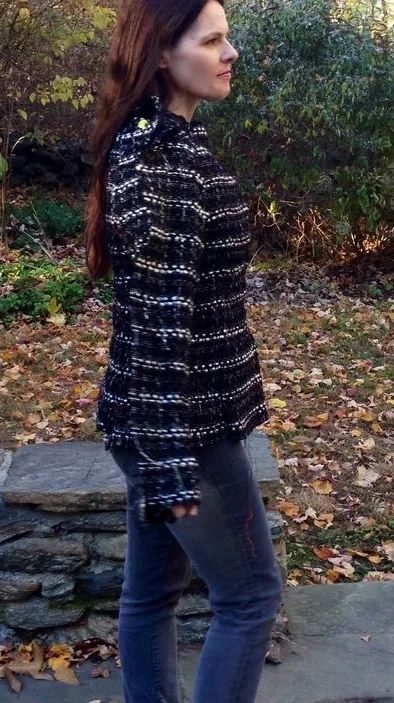
So when Tracy sent out pictures this week with her finished French Jacket I swooned, seriously, swooned. I would not normally be that cheeky :-0 but I emailed her right back and asked if she would let me share this wonder and she said yes!! Its so relevant to this post as well, becuase she picked a ombre silk that required so much patience and planning to quilt, and the end result is perfection.
I remember her coming back from a visit to Jo-annes with a big bag of threads, she had matched each and every colour....and yep she changed that spool for almost every line...it was amazing to watch and then she topped it by making a vest as well, from the same pattern and added killer studs, so of course now I have to make one !!
How can you not be inspired to make one now??!!!!!
Next Monday is basting and sleeve cutting for anyone who is using a fabric that needs matching..
Of course any questions, just send me a quick email...I'm catching up with my jacket for the next few days and so will get right back to you :-)
Enjoy the rest of the week!
Leisa