Lace skirts and Marfy's free pattern 0757
This is definitely one of those skirts that look better on a body than on a hanger....but we got another six? eight? ten? inches of snow again yesterday and there is no way I am standing out there wearing a mid length skirt and nice pair of shoes only to watch them disappear into the mountains of new and old snow.
But as soon as this cold weather breaks, I'll celebrate with some pics :-)
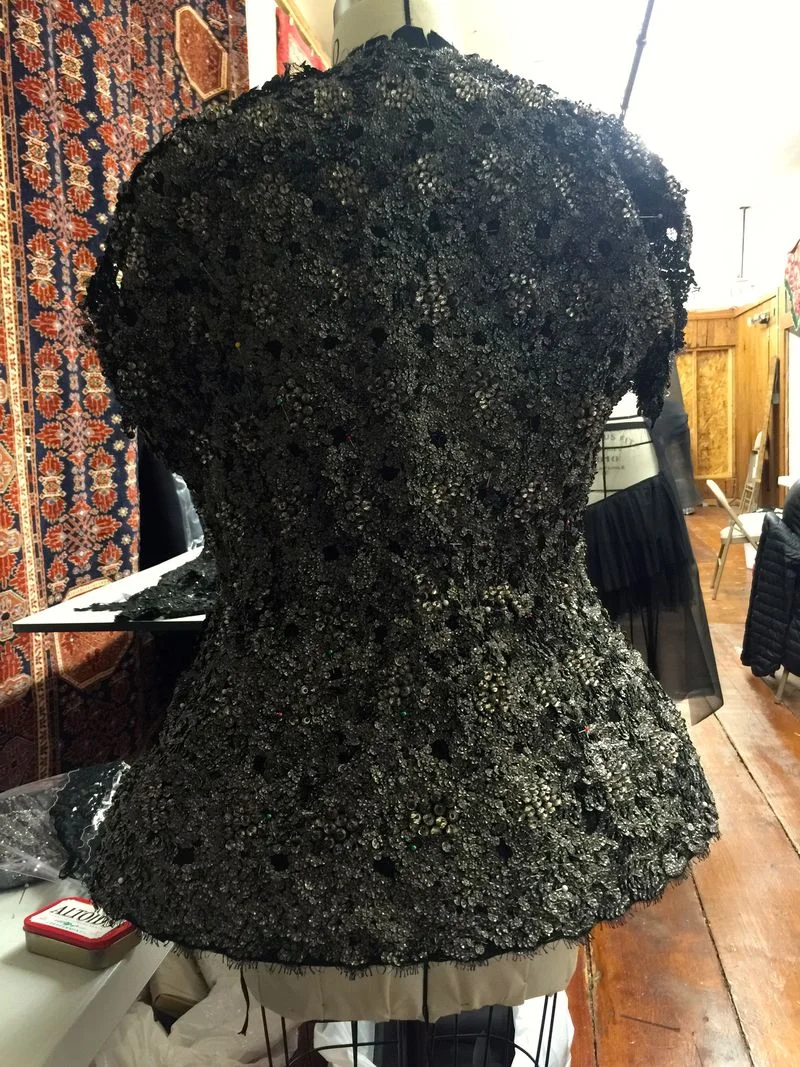
I absolutely loved working with this lace, it was stable and thick enough to manipulate easily but soft and light enough to make the darts and seams almost invisible.
I used my altered Marfy free pattern from last years sew along without making any further alterations, cutting a muslin first to check fit and then cutting a secondary cream silk charmeuse layer before joining them both together with some thread basting.
Once the two fabrics were joined (muslin behind/silk on top) I sewed the right hand seam with a 2.5 stitch from top to bottom leaving the left hand seam open.
The lace has to be joined using lines of handstitching so the three fabrics (muslin, silk, lace) make a single fabric, but it can't be laid down or sewn flat because of the curves of the hips, thighs and waist.
I've tried a couple of ways to do this over the last few years - my large ham, rolled up fabric mounds etc but the only way I've found to get that exact fit is to join them while it is on my dress form.
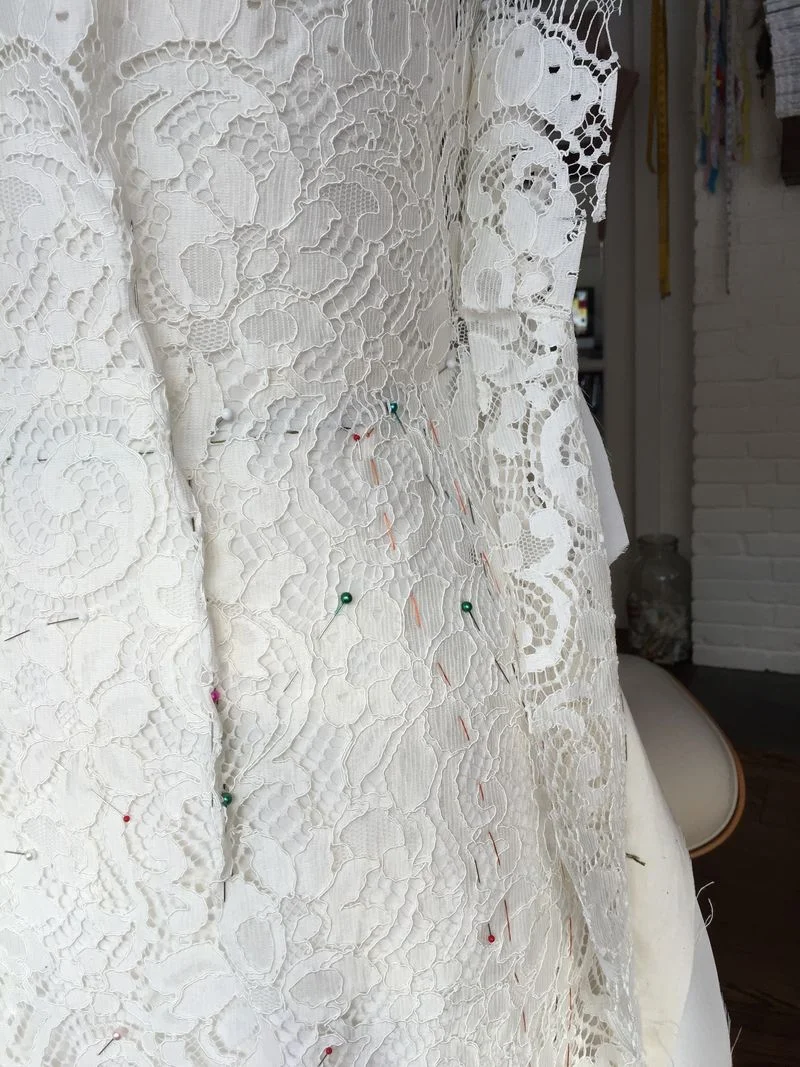
I thought I would start with the hem for this skirt, using a scallop or trim detail to really show detail, I played with the proportions of the hem and underlining until I liked what I saw, and then pinned the hem all the way around so the lace could not be pulled and moved... and from there it was a simple case of pinning every few inches while smoothing the fabric all the way to the waistband.
Interestingly, if the lace is pinned smoothly following the lines of the pattern,then the dart excess appears automatically where it should, which makes it very simple to pinch and shape them out nicely.
Although this can take half a day or so to do properly, its not hard. You just need a light hand and lots of patience....
and once all that lace is pinned and smooth, the form can be removed from the stand and laid flat on a desk... having it laying flat makes sewing basting lines so much easier than when the form is upright.
Before I started basting, I tested a number of coloured silk threads on a small square of the lace by running a few different coloured silk stitches from top to bottom, leaving them to sit overnight before removing them. It's amazing what tiny stains a thread can sometimes leave, especially those vintage spools...
In this case, the Orange Belding Corticelli left no marks at all and pulled out quickly and smoothly.
Starting at the waist, I ran long stitches down as far as mid thigh removing pins as I went (past mid thigh the skirt straightens out anyway and can be sewn flat on a table)
I'm not very orderly when I do this kind of work, but each column is roughly two inches apart, with large running stitches securing the lace firmly.
When the front and back had been basted to mid thigh, I sewed a machine basting seam of 5.0 into the open left seam so I could try it on.
and I don't know why, but I am always surprised that no matter how carefully I work, little bubble's of fabric do appear...but I just stick pins in those looser sections while I am wearing the skirt to mark them, and then once the skirt seam is unpicked, open up the silk basting and run new basting lines to each area carefully, while smoothing out the fabric.
It's not an exact science, and I find that it's not unusual for me to try the skirt on two or three times - but it's so much better to have the lace laying nicely at this stage before you go on to the real hand stitching.
and once it's all behaving....get that 20 plus hours of tv or audio lined up and ready to go!!
I like to use a single thread of Gutermann - no beeswax and a single tiny knot which I tuck under a solid lace section close to where I start sewing........Its not easy to get the needle to the underneath of the skirt to begin as it moves the lace and skirt to much for my liking but by using a single tiny knot on the outside it can't be seen at all if you start in the middle of a design detail.
and because this lace has re-embroidered cording, I was able to use that to hide my stitches, hooking each tiny stitch over the cord and then popping up 1/2" or so later following the orange lines to some extent. When I finish a line, I always place a pin at the top and bottom - its easy to go back and re-sew the one you just finished again otherwise, trust me!
Spot the stitch :-)
Once the skirt has been sewn down to mid thigh all around, its time to baste that side seam again for another fitting.
I don't tend to cut any dart sections until I can clearly see that the lace surrounding the darts is in place..its simple to see with a quick fitting.....and only then will I remove the basting stitches and open up the skirt again.
Here, I often choose to use a ham rather than my form, I have hips and a stomach and this emulates it far better than a more flattering but not real stuffed form!
I'll also follow the lace design when I cut, as corded lace is a continuous piece and will fray at the ends once snipped, so I often play around for a while before cutting to make sure I only remove small details leaving one or two big uncut areas for overlap.
Above- the left side ends up underneath the large scallop which draws the eye away from a cut line...
and if I feel the line is still to obvious, I add back another little detail just for interest (yellow pin)
One of the back darts.
These always take quite a lot of time to sew, as I like to make sure nothing is going to work free over time but its nice peaceful work.
and once finished - I try it on again. You just never know if a piece of cut lace has been pulled to tight, or left to loose, but it all becomes so obvious the second its on, lace can sadly be fairly unforgiving when it comes to mistakes.
But it all looked good, so I opened it up again, laid it flat on the table and got on with the job of sewing down the lace from mid thigh to hem...
and once done, I sewed the seam permanently using a 2.5 stitch, steamed it flat , and then draped it over a sleeve ham to cut away the lace in the same manner as the darts making that seam all but disappear....
For the zipper, I used an 9" all purpose white generic and a pick stitch..
I really tried to make this simple as there is nothing worse than getting some cord stuck in the zipper, so instead I trimmed the left hand side right down to the edge neatly...
and then did the same on the right side, choosing to leave a single exposed large flower detail at the top and a small scallop at the bottom.
And after sewing a tiny snap in place to the underside of the cutout, its almost invisible when done up.
Finally, I stay stitched a silk charmeuse lining to the waist seam at the top and then attached a Petersham ribbon to that line stitching on the outside, flipping it over, cutting away the excess layers underneath and machine stitching the ribbon at the side seams and darts to hold it in place.
Have a great week!
Leisa