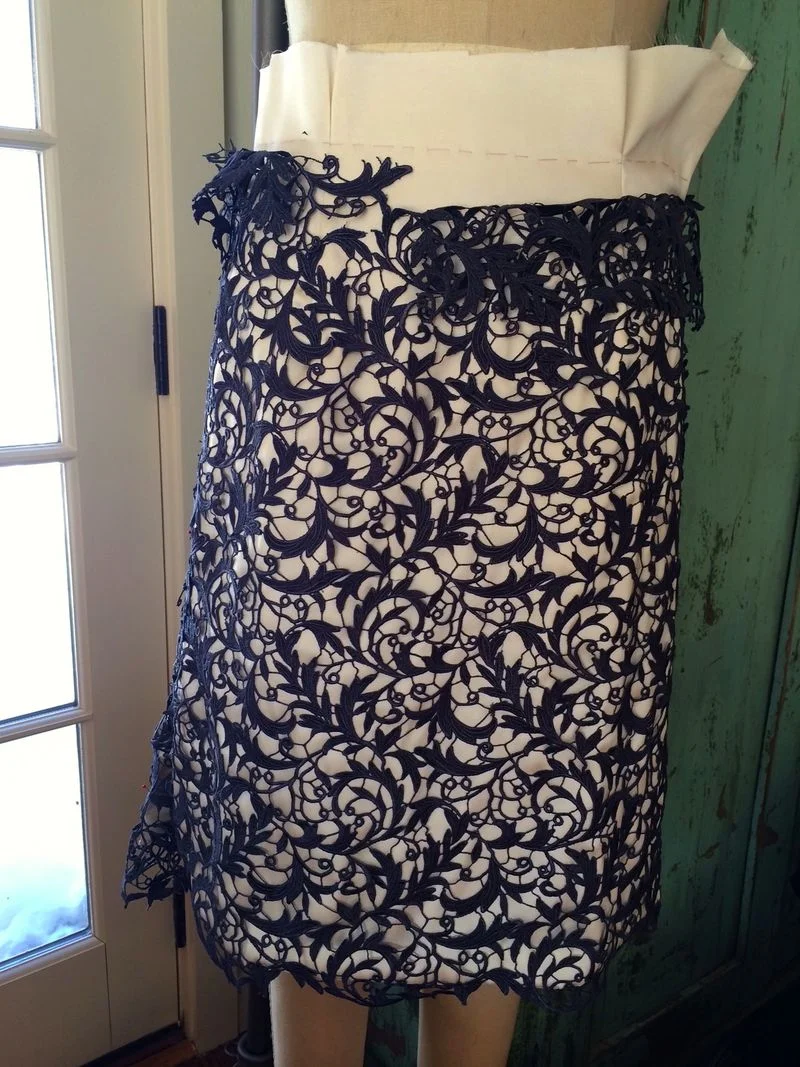
Marfy 0757 free skirt sew along P2 - fabric, vent, underlining/interfacings and thread tracing
So many possibilities, I don't know what to use next!!.....
Anyway....hopefully at this point you have a great fitting muslin and your seam allowances have been added or removed depending on your preference......(see Pt 1 for more info)
So lets cut some fashion fabric :-)
VENT ADJUSTMENTS
I did want to mention before you cut, that after playing around with different vent and slit options, the one below is, I think the nicest and simplest to do.....
I added about 1" to both sides of both main skirt pieces (shown above) but of course you can add more if you prefer, depending on how deep you prefer your slit...
There are a lot of advantages to doing it this way, the larger seam helps keep the right side flat and bulk free while reducing the possibility of seeing the wrong side of the fabric when you wear the skirt - a lining will hide a lot but it will be moving independently .........and of course the seam is invisible from the outside as its sewn to the underlining and not the skirt which makes the finish clean and quite lovely!
Its finished by folding the edge under a 1/4" and catch stitched to the organza.
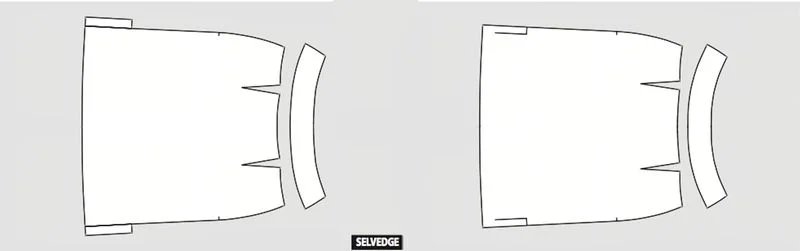
CUTTING THE FABRIC
I've included some fabric layouts below for different widths....
Original with 5/8" seam allowance
Couture version with large seam allowances
Narrow width fabric with 5/8" seam allowances
Couture version with 5/8" seam allowances
WHY UNDERLINE?
Underlining is my secret weapon when I sew. It elevates every garment I make, consistently.
and while it is another step, it is really really worth the small amount of extra time it takes :-)
So what is a underlining?
A underlining is an added layer of fabric joined to the wrong side of your fashion fabric, so they become one. It does not replace a lining or interfacing's, an underlining is purely for the benefit of your fashion fabric.
It gives hidden support, can offer structure, lessen wrinkling and bagging, hold pleats and folds, hide stitches or alter colour.
It will also be used for your pattern notches, seams, grainlines and hemlines, which will save your fashion fabric from being marked.
So how do you decide if you need one or not?? I usually make decisions after I have made my final muslin, I start evaluating the pattern and the fabric I am using - does the pattern need structure? will the fabric loose its shape? do I want to show the hem or hide it? Also consider the weight and drape of your fabric, do you want to change it or assist it? enhance pleats or gathers? hold them from the inside so there is no visible stitching from the outside??!
Underlining's look best if you work with the fabric you are underlining and not against it. In principle you are using it to enhance the look, not alter it.
For example... a very large silk skirt panel with an organza underlining will not hang correctly.....the silk will want to drape and fold while the organza will be stiff and heavy, bagging around the hem and pulling the skirt out of shape. A lightweight crepe de chine in a neutral colour would be far better.
When I made my corset last year, I underlined the taffeta dress it was to be used in, with a flannel and heavy sateen cotton to hide the boning..and give the outside a smooth firm finish..
My yellow lightweight linen skirt was underlined in silk organza to reduce wrinkling and bagging, and my silk dresses are underlined in crepe de chine for longevity and my favorite invisible hems.
and while there are no rules, some fabrics will work far better than others....
Lightweight linen - silk organza or batiste
Mid to heavy linen - muslin/medium cotton/broadcloth
Four ply silk/double faced charmeuse - silk crepe de chine
Silk duponi - silk organza
Wool crepe/ cashmere - silk organza/batiste
Boucle - batiste
Silk charmeuse/crepe de chine etc - self fabric
Heavier fabrics for warmth - cotton flannel
*Its worth having a little stash to hand, some black and white silk organza, a couple of yards of batiste, some crepe de chine... Natural fibers work best for underlining, they are stronger, and fray less*
For even more great info:
Threads magazine here
Sew daily here
Lladybird here
Sewaholic here
Britex fabrics here
CUTTING AN UNDERLINING
(You can find lots of info HERE on seam allowances, sewing with silk, carbon paper resources etc etc from my blouse sew along to compliment this post)
If you are sewing with a added seam allowance -
Lay, your still joined cut fashion fabric and pattern piece right side up on to your underlining. Grain lines should line up exactly as the two need to work together from now on.......
Cut around the seams carefully so that the two remain the same size and then pin the three layers together (pattern, fashion and underlining)
Transfer your markings, notches etc by laying the three (underlining down) onto a carbon sheet and using your pattern (facing you) trace all the relevant info..
and remove your pattern piece carefully replacing your pins one at a time to stop shifting..
Then machine sew a 1/4" in using a machine basting stitch to join the two.
COUTURE UNDERLINING and THREAD TRACING
This is a great introduction to couture sewing, I always feel this is the stage when I become invested in my garment...spending some one on one time thread tracing and getting to know it!!!
In theory you should have cut your pattern pieces in full without a fold, with the fashion fabric facing up and have left large seam allowances all around.
( Although you have made a muslin, its never going to fit quite the same as the final garment,real fabric behaves differently... so by sewing with these large seams allowances, you are allowing for final fitting adjustments, its amazing how useful they can be)
Lay your pieces right side up onto your underlining matching grains and roughly cut around using your fashion fabric as a guide.
and use your carbon paper, underlining face down, to mark your seams, darts, hem, grainline and vent....
*DO NOT REMOVE YOUR PATTERN PIECE*
THREAD TRACING
Thread tracing is the couture version of machine basting as shown above, you are, in its simplest form, using it to mark out your pattern, and as a way of joining your underlining and fashion fabric.
Why thread baste?.... once your standard seam lines are removed from a muslin, you have to find a new way of transferring the sewing lines to your fashion fabric, as you will remove your pattern before you start sewing it all together, thread tracing is a perfect semi-permanent solution, as all the stitching will be removed when the garment is completed.
(Some info copied from my LFJ sew along post)
Its easy , very relaxing (and addictive!!) to do.......there is only one really important rule - your garment piece must remain flat.... no holding it in the air like you are ready to darn! your two grain's are not stable enough at present to be moved around and stretched out.
Silk thread is perfect for this process, there are a few places that you can buy it. Jo-annes in the US has a small stock, The sewing place sells my favorite Japanese version which is very inexpensive at $3.50 skein..and if you can get hold of Belding Corticelli lucky you, its the gold standard of silks!
Karen of Did you make that? managed to track some down, and so nicely shared her supplier!! and I was lucky enough to stock up in my first class with Susan Khalje...but I think she sold all hers in a matter of weeks.
but if its to hard to find or you don't think you will use it again, a double strand of cotton will do the trick....just snip it out rather than pull at the end
and of course with either method , choose a bright colour that contrasts really well so you can follow it easily.
So why silk? ..well simply.. a cotton spooled thread is made up of lots of little threads woven together to make one strong thread, so that it "grabs" the fabric and holds still... it has a rougher texture and is very stong, a silk thread is usually a single strand which gives it the ability to glide through fabrics. Its not strong enough to join garments together for any length of time and will disintegrate far quicker than a cotton but for thread tracing it is simply perfect.
and again, as these stitches will stay in your garment until the very end, I use one colour initially and then as I alter or adjust a sew line after fittings etc I use different colours so I can remark my pattern and remember what I have done.
As these are just guidelines, the stitches don't need to be neat or too small...
I like to stop at each straight line seam junction and leave a tail, as the threads are so much easier to remove if you don't have to pull huge strands that wrap around corners etc.
and remember to thread trace your grain lines....I usually mark with pins on the right side and then pin again from the underside using the upper pins as the guide then I remove the pattern and pin on the right side again so I have a guide for the thread. I know its a extra stage but once you get used to looking for these when you fit they will change the way you think, pulling a grain offline can cause so many wearing issues that its a great habit to get into!
On Monday we will add darts, close up the seams and finish the side slits...
Have a great weekend everyone!
Leisa