Marfy 0757 free skirt sew along P4- Hem, waist facings, zippers and linings....
So this is it, the final post for the basic skirt..... and I do think, that this will become my go to skirt pattern, its very flattering and can be easily tweeked for lots of different looks.
WAIST FACINGS
This was a new design element for me, I don't normally make or buy skirts and pants without waistbands......and I can't really think of a good reason why now that i've tried them!
Its really incredibly comfortable not to have a waistband digging into your waist at the end of a long day....gaping when you sit or have it twisting around as you walk...
and as this is such a simple finish , I'm going to show two different facing, both of which are very straightforward to sew...one using traditional techniques and one incorporating more couture methods.
The purpose of a facing is two fold, it enables you to finish your skirt cleanly and neatly....and provides a foundation from which your skirt can hang well.
To begin, your facing will need to be interfaced . The weight and type of interfacing you choose will depend entirely on your fashion fabric.
Again, you are looking to compliment your fabric, not alter it. A lightweight skirt with a stiff facing will create ridges and bumps, it will also move differently from the main skirt and cause distortions.
For a lightweight silk, linen or cotton, a lightweight non stretch iron in fusible or thread traced organza will work perfectly. This will enhance the drape and hang of the skirt while remaining invisible.
A medium cotton, linen or wool could easily handle a medium non stretch iron in fusible, you could also use a thread traced or machine basted scrap of muslin and even self fabric, if it is not bulky and will not feel scratchy and uncomfortable against your skin.
and don't forget, while iron on interfacing has no grain, organza, muslin and self fabric do. Make sure these are cut exactly on grain so they replicate your fashion fabric.
As iron on fusibles and organzas are usually quite thin, a seam grading should not be necessary but should your facing start to feel thick and bulky once sewn grade your seams a little to reduce ridges and thickness at the top of your skirt.
SO - Below are two of my favorite ways to face and line a skirt, I do, however, want to mention that there is really no right or wrong order in which to assemble these final stages.... its truly personal preference.
HEM
I like to hem my skirt before I add the lining as I work very methodically, and like to complete each stage- in this instance the main skirt - before moving on - but it works just as well if you leave it until the end :-)
and again, the fabric you choose will for the most part dictate your hem finish.......
A silk skirt will follow the blouse sew along hem options found here.
but a medium to heavy weight fabric hem can be mitered and top stitched for a neat clean finish...Or catch stitched if you have an underlining.
As you can see I like to use big catch stitches, and I think thats one of the additional benefits of handsewing...a gentle loose soft stitched hem will hang and move with the fabric far better than a rigid machine sewn stiff hem will.
METHOD ONE - Facing, zipper, lining.
Facing
In my original linen skirt, I sewed the facing using a machine stitch, then hand picked the zipper and finally added the lining.
To follow this method, pin the facing RS to RS of the skirt, it helps here to match the side seams and pin there first.......and then sew the entire facing down from zipper seam to zipper seam, securing the stitching with a backstitch at the beginning and end.
*Dont forget - the facing is already drafted without darts, so don't add these... also triple check that your front and back wasitband seams line up before you install your zipper! *
Zippers
I think most sewers find a zipper they prefer and stick with it.......personally I will do pretty much anything to avoid using a machine so all purpose zippers are the only ones I buy and use.
They tend to be much more reliable than an invisible zipper, in part, becuase their teeth are usually bigger and stronger.......plastic teeth are far more prone to breakage and mis- alignment....
and honestly can you ever remember an all purpose zipper breaking on you?? I have nightmares about invisible ones that have...at parties, at work.....
There are a couple of ways to install an all purpose zipper - by machine or by hand with a lapped finish or standard...
I like nothing more than to use a lapped method with a pick stitch. The lap hides the zipper completely and the handstitch ensures a perfect fit.....it looks so lovely :-)
If your skirt has not been underlined, you will need to reinforce the seam where the zipper will be attached by either using a iron on fusible interfacing or by basting some organza selvedge/ stay tape or similar to your seams.
This is one of those steps that when missed, can make or break your final skirt........a reinforced seam will stop your fabric from being pulled and stretched, keep the zip stable and stop any buckling or waving of the fabric.
I'm going to use links for the different methods, as there are so many good tutorials already available:
Sunni's free craftsy zipper course - here very very good!
Centered, lapped and invisible machine sewn - here
The machine sewn lapped zipper - here
The hand pick stitched zipper - here and here
If you do try a hand picked zipper and I really really encourage you to try it once! then use a double strand of beeswaxed thread.
Lots of beeswax info here from my LFJ post.
LINING
I found that when making the yellow skirt , adding the lining as a final stage after the zipper and facing was easier and allowed me to be a little more accurate.
and as Marfy do not provide lining patterns, we do have to make one. They are very easy to create though, using the original pattern as a base.
For this method you are going to reduce the skirt width by the facing width.
I've used my pdf original to show this as I think it's clearer , but you should use your muslin, paper pattern etc.
I began by pinning the dart together so that the facing pattern replicates the skirt pattern. You will sew a dart in the lining, but here we are just marking where the facing will end...
I marked this line in yellow, but don't forget that as the pdf has no seam allowances , you must add back 5/8" or your seam allowance (show in pencil)
Line the letter notations up..
and then flip the facing onto the pattern, lining the top parts together (not shown!)
Mark the pattern with the facing line (yellow) and the new seam allowance (pencil)
Cut your lining on grain replicating your skirt grain lines minus the facing portion you have removed.. Once the two pieces werecut, I marked and sewed my darts, and French seamed the sides. I also hemmed my side slits now as they were easier to get to....
So, now you can sew the two together by pinning your facing to your lining RS to RS and machine stitching along the seam line, once sewn grade your seams if it is bulky there...
Before you grade and reduce excess seam fabric, fold the lining into its correct place and check all your seams line up, :-)
Press your waistband seams so the facing favors the inside and either top stitch the upper part of the waistband to hold the facing in place or use a tiny pick stitch.
and sew your lining hems, letting them hang approx 1/2" above your fashion fabric hem.
Thread bars for linings
You can either let your lining hang over your slits or sew a thread bar to join the fashion fabric and lining loosly at the bottom near the hem so that the lining edges remain out of sight but allow for movement...
More details for creating them here
(and I'll post pics tomorrow)
METHOD TWO - Zipper, lining and Petersham.
What is Petersham ribbon?!
I love petersham ribbon, and while its not the easiest thing to find at most local sewing stores, there are some wonderful suppliers online (links at the end)
Petersham should not be confused with commercial grosgrain ribbon. Petersham is pliable, curves easily and has a scalloped not a fused rigid hem on both sides of the width (which is how it can move and curve so nicely) a perfect choice for a waistband.
If you have ever made a garment and added a waist stay then you will know some of the advantages of using this in place of a fabric facing.
It "sits" the skirt to your waist, is strong enough to hold a wide array of fabric weights and feels lovely next to your skin. I always think of it as a very decadent expensive looking finish.
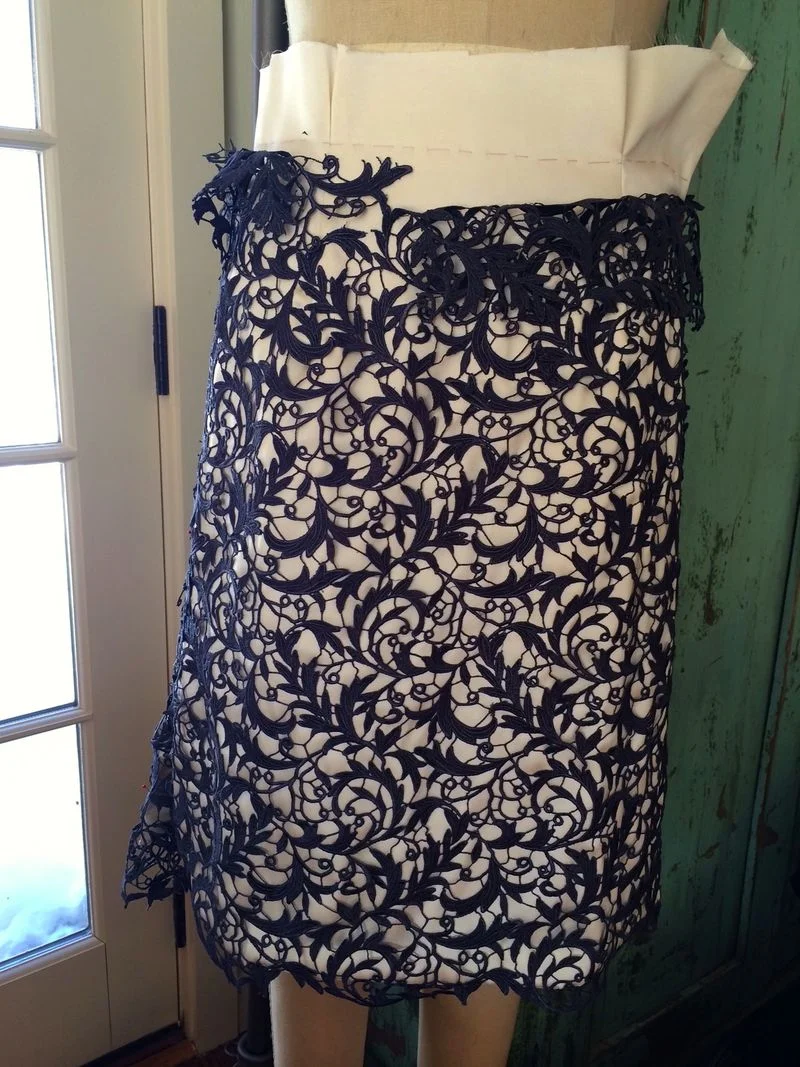
So, of course after spending three days hand sewing lace to my skirt, this was really the only way to finish the waist.
and ironically for such a beautiful look, its almost easier and quicker to do than a standard facing.
I tend to keep a little stash on store at all times, and favor the 2" width more than the others - they feel more secure and substantial on my waist (it ends up being about 1.5" wide once sewn) and although they come in a huge variety of colours....I generally just stock black and white...(I usually buy one yard per skirt)
In theory for a facing, the ribbon won't be seen anyway....although of course if you want to use it as a actual waistband (more Friday) than a matching colour looks gorgeous!
LINING and PETERSHAM RIBBON
The lining will join to the top of the skirt, mirroring it exactly, so this is nice and easy process...just cut your lining from the same skirt pattern. Add your darts and hem your slits now....(leave your hem until the lining is in place)
Pin the lining to the top of your skirt following either your thread traced lines or a seam allowance.
The wrong side of your lining should be on the wrong side of your skirt. The ribbon will be sewn right side, the seams of the skirt graded and the ribbon flipped to the inside, effectively hiding all the seaming........The ribbon will sit on top of the lining..
*Again, double check that your side seams, and darts line in both the lining and skirt.....this will help your side slits line up...*
and sew using a standard seam allowance or follow your thread tracing.
Leave your lining on the inside and pin the petersham ribbon to the outside of your skirt. Leave at least 1" overhanging on both sides of the zipper.
and sew the ribbon to the skirt, using a very small seam allowance, as close to the top of the ribbon as possible to reduce bulk, cutting away any excess skirt and lining fabric necessary..and flip it over, so that it lies on top of both the lining and skirt on the inside.
Fold the ends neatly on both sides of the zipper and use a tiny fell stitch to hold them stable.
To keep the ribbon from rolling up or twisting, either a hand sewn pick stitch or topstitch is necessary at the very top of the skirt. I choose a pick stitch (shown before pressing so you can see it clearly!)
I also like to add a few stitches in the left side seam to keep it firmly in place.....
Links:
The last stitch - here
A fashionable stitch - here
Suppliers of Petersham:
A Fashionable stitch - where mine is from - here
Vogue here
Britex - here
Lining thread bars
See above....
I'll be back Friday with some skirt alternative fabrics and some pattern making :-)
Leisa