Sew Along Part 2 - Seamless muslins, sleeves, fashions fabrics and linings
My dress is almost done, but by Friday, when the sew along notes I was making were covering my entire desk , it occurred to me that I needed to stop playing with tafetta and get started on the boucle...... and as I get lots of emails asking about Marfy and how to use their patterns I thought I would include my muslin process at the beginning for anyone who is interested in either trying one or making this jacket with full couture construction techniques.
This is a huge info/photo heavy post so I have split it into sections, just keep scrolling until you find the bits that interest you.
I will have left things out, without a doubt, so just send me a note in the comments and I will add your suggestions to the relevant sections
and we need a Blog roll and list of sew alongers!, its great to watch everyone else's progress, ..leave your link in the comments on either Inna's blog or mine or tweet/facebook us ...tweet tag is #frenchjacketsewalong and if you don't have a blog, just leave me your name and country if you would like to be included..
I was going to say grab a coffee but this might take a bottle of wine .......
SEW ALONG PART 2
1) MUSLINS - removing seams or using a pattern that don't include them.
2) SLEEVES - one piece to two and two to three
3) UNDERLININGS - pros and cons
4) CUTTING THE FASHION FABRIC - laying out, pining and cutting
5) REINFORCING - organza for shoulders
5) THREAD TRACING - why silk?
6) LINING - laying out, pining and cutting
MUSLIN
My middle daughter has been begging for a French jacket for the last two years, we have a similar aesthetic but she is much taller and curvier...and mine do not fit her, much to her disgust.
So when we started thinking about the sew along, I made a deal with her....If she makes her own, sewing as much as she is capable of , I would help when she gets stuck., she's been impressivly focused for the last few days!
Lila choose New Look 6028 which freed me up to make the more interesting Marfy 3182, the sleeves on this pattern are a little unusal and a bit confusing to use as an example, so I shall use her's when I need to for fit and example purposes.
Although any jacket pattern can be used, one with princess seams is the best and simplest choice. Boucles are generally thick and impossible to add darts to, so any and all shaping can be achieved through the extra seams.
On most commercial patterns seam allowances are included (Marfy already come without) and for this method they need to be removed. Its really simple, just mark off 5/8" inside the main lines, and cut them out. The pattern will look very small as it is now the finished garment size...
If you've never sewn without seam allowances, I would recommend trying it..... its really hard to make meaningful alterations with 5/8"....a couple of inches all around free you up to play and experiment with a muslin and that can ultimately leave you with much better fitting garment, which lets face it is the whole point!
For me, I've found that although it takes more time at the start of a project, it really gives me the confidence to use more expensive fabrics as I have a better idea of the finished garment....and no more sinking feelings are really quite priceless!!!
When all the pieces are cut and ready, pin them on to single layered piece of muslin leaving at least two inches between each (so you end up with at least a inch on each pattern piece) and very roughly cut around them.
If you have carbon paper now is the time to use it, however if you prefer to....you can just draw around them like Lila does.
As this muslin will ultimately become your working pattern you will need to preserve your seam lines and be able to see them from both sides for fitting, so the easiest way to do this is to sew over the pencil marks.
Now do the same for the opposite side of your jacket, laying your paper pattern face down on the muslin.
Make sure you include the grainline on each piece when you pencil mark and sew them. Its so easy when fitting to tug or pin a sleeve or bodice piece and alter the grain, when you have the grain line right there , you can quickly check that each piece is still hanging straight by looking at it
Also if you have a matching/patterned fabric the crossgrain is useful to include.
Then sew it all together for a first fitting. My Marfy was a really good fit, it only needed some minor shaping so I pinned the adjustments on the outside, and marked where the pins were.
Its worth remembering here that as this is the first fitting of at least two or three, you are really only making sure that you cut a good size, the sleeve fits ..and that the overall look is close to what you. A cotton muslin will behave differently than a quilted boucle that this can only be a trial run. Don't worry to much about jacket or sleeve length, its better to leave more so you have options when you try the real thing on.
Fitting tip - pin the shoulder seams together rather than sewing them and start adjusting from there. I've had really good results working from the top down, sometimes a shoulder angle adjustment can change the whole fit imediately and its as good a place as any to start!
Use your French curve to draw the new lines and cut off all the seam allowances.
Lay the adjusted piece over its opposite, marking the new lines and remove the excess fabric so that both are the same (if your body is symmetrical of course!) otherwise both sides will be different...and put away the original paper pattern, you won't need it again.
So now you should have both sides of a complete pattern with all adjustment transfered, seam lines removed and every piece marked with match points and labeled..
SLEEVES
New look 6028 comes with a single sleeve, .....in order to make a three you need to have a two piece.
This is actually fairly straightforward....I absolutely love this you tube tutorial...and its a great introduction to patternmaking...
and i'm going to admit to being very intimidated with the amount of interest shown in the three piece...its almost a holy grail for sewers, so to make sure I was going to get this right, I emailed Susan Khalje and she suggests...
"that the easiest way is to split the sleeve down from where it joins the shoulder seam, parallel to the grain line.....from there mark the new pattern so that it shows a upper sleeve front, a upper sleeve back and the undersleeve...the right sleeve is shown below.
My one to two sleeve is the left side piece and the two to three is the right side.
and for the overlap you should calculate the length of the opening at the base of the sleeve - I usually go for about 5", but it depends on how long the arm is, where the sleeve is going to hit, how wide the trim is, how many buttons there will be............"
Of course when Susans jacket DVD is released there wll be a much more detailed version but this will still give you the desired result...... Lila and I did a couple of test runs with this method today and it works perfectly.
Yours will look a little different than mine as my lovely daughter has circus worthy double joints...and I have to allow for the extra elbow/arm rotations she can achieve!!
UNDERLININGS
There are some books and patterns available that suggest underlining a French jacket. While the RTW jackets have a iron in fusible, the haute versions do not.
A French jacket should feel like you favorite cardigan, very soft and malleable. It should almost hug your body when you wear it while gently flaring away at the hips.
Using a organza underlining or interfacing will make the wool firmer and give it a more tailored appearance, if thats the look you are after then organza is a perfect solution. It will give the jacket body without adding weight....if you are planning on the true haute version then leave it out..
If your fabric is thinner and would benefit from some extra support or if your lining is showing through the wool then a thin cotton batiste or voile is a great alternative and allows your fabric to retain its drape.
Poppykettle recently wrote about her adventures with underlining and batiste and has some great pics...
and Susan's thoughts on underlining are below :-)
Underlining is a fabulous tool - I always think of it as making the fashion fabric what it is, but more so - it gives support from behind the scenes, and that support can be dramatic or subtle. I think it's one of the most important tools in the sewer's arsenal. It:
- lessens wrinkles
- fills out pleats and gathers
- can shift color (can make a white white, or less white, for instance)
- hides stitches (gives a layer for stitches to go onto -for a hem, for instance)
- keeps the fashion fabric from distorting or losing its shape over time
- can really alter the nature of the fashion fabric, if need be
The French jacket is a little different, because in this case, you want to maintain the softness of the fabric - so the little bit of strength you need comes from the right fabric and the quilting. You could add underlining, of course, but it would change the nature of the fabric - and in this case, away from what you want.
and if you would like more info I found these articles in Threads Magazine
March 2008 No. 135 by Kenneth D. King
March 2011 No.154 by Susan Khalje
March 2013 No.165 by Louise Cutting
THE FASHION FABRIC
There are always lots of questions about pre-treating the wool. Honestly I don't...by the time you have quilted a silk to the fabric, added trim and sewn in a chain would you really be comfortable throwing it in a washing machine or hand washing it? I always send it to the dry cleaners and so far have not had any shrinkage issues ...... but should you want to pretreat I will refer you over to Carolyn of Diary of a sewing fanatic who is the master (mistress?) of all things wool..and knits and cottons and.......although this article specifically refers to crepe, steamed boucles and tweeds should behave in a similar manner.
Ramona also suggest this link for more wool info...
So finally....your muslin is cut, altered and ready to go...its time to get the fashion fabric out, at this point I always snip off a small piece and take a good look at it, this is the last time you can make meaningful decisions....pull the ends, the more it frays, the bigger the seam allowances will need to be...is there a repeat, a pattern? does the grid differ in size between rows? you need to know all this before you start pinning and cutting..then drape out your entire yardage and stand back...sometimes there is a pattern you did not see close up...I've made that mistake a few times!
I found the most gorgeous French boucle in Mendel Goldberg last week, with a grid pattern that will let me attempt some matching...and layed it out in a single layer right side up on my table
Sunni at a Fashionable stitch did a great write up recently on her plaid adventures and pattern matching , highly recommend...
I always play around with the pattern at first, by just laying all the pieces out and getting the feel of how I want them to be pinned...and I measure at least twice to make sure my grainlines are exact, its a generous process, don't squash things .....if you end up needing a little extra fabric on your first real fitting , you will be so happy you built it in, and pin pin pin..boucles and tweeds are usually very stable on the lengthwise grain but the crosswise can move and groove.
Also don't forget if you intend to use your selvedge as part of your trim, arrange your pattern further from the edge. I lay my pieces at least 4" away so I end up with a continuous two inch wide selvedge that runs the length of the entire fabric piece.
You can see above that there are large spaces between each pattern piece, my fabric is not fraying a lot but I am buidling in extra play room for matching.
Its also worth making sure you leave a couple of inches at the top of the shoulder pieces as these seams will be used for sleeve heads...
Don't forget if you intend to use your selvedge as part of your trim, arrange your pattern further from the edge. I lay my pieces at least 4" away so I end up with a continuous two inch wide selvedge that runs the length of the entire fabric piece and cut that off first before I start cutting out my pattern pieces...
so take a deep breath, and cut one left and right of each piece right side up until you have a entire jacket.
HOWEVER IF YOU ARE MATCHING PATTERNS OR STRIPES DO NOT CUT YOUR SLEEVES UNTIL THE ENTIRE BODICE IS BASTED TOGETHER!!!!
I will show in detail how to do that when we reach that stage, you will get a much more accurate line up if you can see visually what you need to match and cut...
and then I use little coloured adhesive dots bought from stationary stores to record info on all my sewing pieces, they don't mark fabrics and a quick pin holds them in place until I am finished, I make far fewer mistakes now I use these!!
REINFORCING
Shoulder seams are the work horse of any garment, everything literally hangs off them and sometimes they need a little help.
You will be amazed at the weight of your jacket when you are finished, trim and chain make them heavier than you would expect..so to help take the strain from the wool we reinforce the shoulder area with silk organza, I needed my back piece and both front panels , but yours might be the side back and side front instead. Its the area below where your shoulder seams join.
This has to be cut on the exact grain you cut your fashion fabric on....the two will need to behave in the same manner going forward.
I'm using Lila's fast unraveling fabric as the example, its a bit easier to see...lay your fashion fabric and pattern piece right side up on the organza aligning selvedges, the organza should end around the bottom of the armseye ...work your pins already holding the fabric into the organza and roughly cut them out....when you thread trace you will join the two together so they will become one.
Btw...keep any pieces of organza selvedge left over as you will use them to stabilize the actual shoulder seam later in the process.
THREAD TRACING
This is one of my all time favorite sewing activities, I always use it as a excuse to download a show and relax!
The one really important rule is that your garment piece must remain flat.... no holding it in the air like you are ready to darn! your grain is not stable enough at present to be moved around and stretched out.
Silk thread is perfect for this process, there are a few places that you can buy it. Jo-annes in the US has a small stock, Inna sells my favorite Japanese version which is very inexpensive at $2.40 a skein..and if you can get hold of Belding Corticelli lucky you, its the gold standard of silks!
Karen of Did you make that? managed to track some down, and so nicely shared her supplier!! and I was lucky enough to stock up in my first class with Susan Khalje...but I think she sold all hers in a matter of weeks.
but if its to hard to find or you don't think you will use it again, a double strand of cotton will do the trick....just snip it out rather than pull at the end
and of course with either method , choose a bright colour that contrasts really well so you can follow it easily.
So why silk? ..well simply.. a cotton spooled thread is made up of lots of little threads woven together to make one strong thread, so that it "grabs" the fabric and holds still... it has a rougher texture and is very strong, a silk thread is usually a single strand which gives it the ability to glide through fabrics. Its not strong enough to join garments together for any length of time and will disintegrate far quicker than a cotton but for thread tracing it is simply perfect.
why thread baste?.... once your standard seam lines are removed from a muslin, you have to find a new way of transferring the sewing lines to your fashion fabric, as you will remove your pattern before you start joining it all together, thread tracing is a perfect semi-permanent solution.
These stitches will stay in your garment until the very end, so I use one colour initially and then as I alter or adjust a sew line after fittings etc I use different colours so I can remark my pattern and remember what I have done.
As these are just guidelines, the stitches don't need to be neat or too small...
I like to stop at each junction and leave a tail, as the threads are so much easier to remove if you don't have to pull huge strands that wrap around corners etc.
and remember to thread trace your grainlines....I usually mark with pins on the right side and then pin again from the underside using the upper pins as the guide then I remove the pattern and pin on the right side again so I have a guide for the thread. I know its a extra stage but once you get used to looking for these when you fit they will change the way you think, pulling a grain offline can cause so many wearing issues that its a great habit to get into!
LINING
At this point your pattern pieces are still attached to the fashion fabric and your thread tracing is in...
Give your non-stretch Charmeuse or crepe de chine a really good iron and lay it out on a flat surface right side down making sure that your grainlines are straight and that there are no flaws in your silk. If there are, put a pin or tag near by so you remember to avoid it.
Pin your pattern pieces to the lining right side up so that the wrong sides are together.
and triple check your grainlines...I know, I know, i'm nagging! but if the lining is "off" the quilting will not look half as beautiful as it should!!
and cut away, again leaving nice chunky seam allowances all around. When you come to fell stitch you will be happy for all the extra silk....so much easier to cut away excess rather than sew it back on (i've done that too!)
Now you can remove your pattern pieces, fold them alway safely and we are done until the 21st when Inna will begin the quilting...
Don't forget a walking foot is absolutely essential for this.....there are lots of reasonably priced generic ones available that are just as good as the $$ brand names.
They do make or break the quilting process , a walking foot will hold the silk back slightly underneath the boucle while you are feeding them both through the machine, if there is no delay the silk gets stretched because of its slippery nature and by the time you reach the end of the seam you have a inch or more of excess stretched silk lining hanging from the wool that won't line up or fell stitch neatly. It will always look a little 'skewed"!
Thats it!!!
Off to do the boring domestic things....how I love to grocery shop :-(
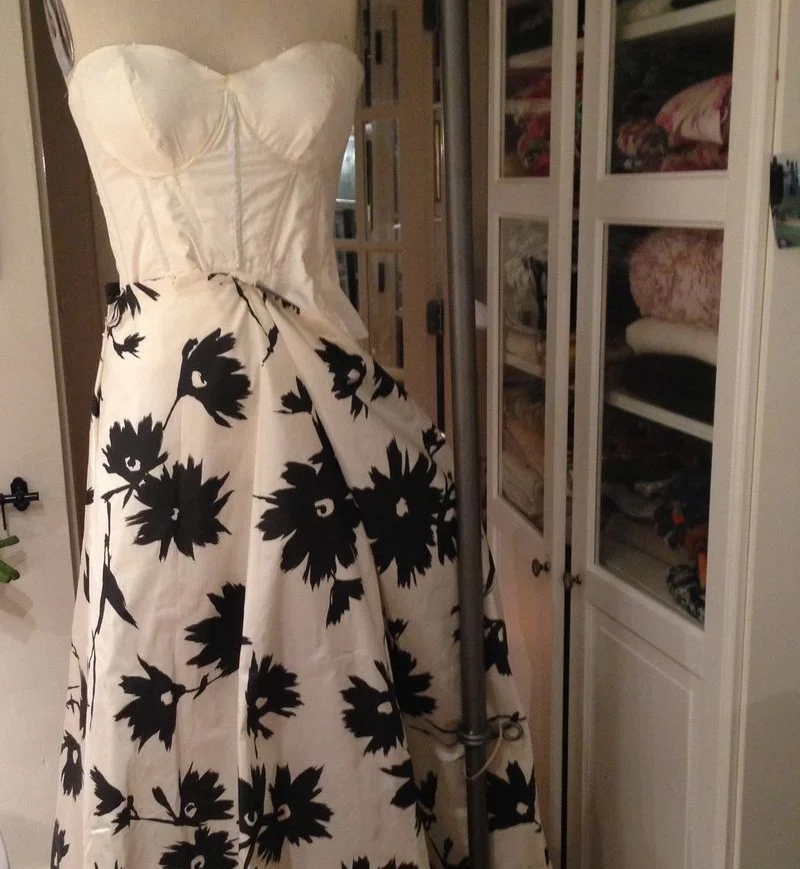
I will be back next Monday with a dress....I am on a mission to tame taffeta although right now it is breaking me!
Wishing everyone a great week, leave a comment if you have a question , I will get back to you quickly...
Leisa