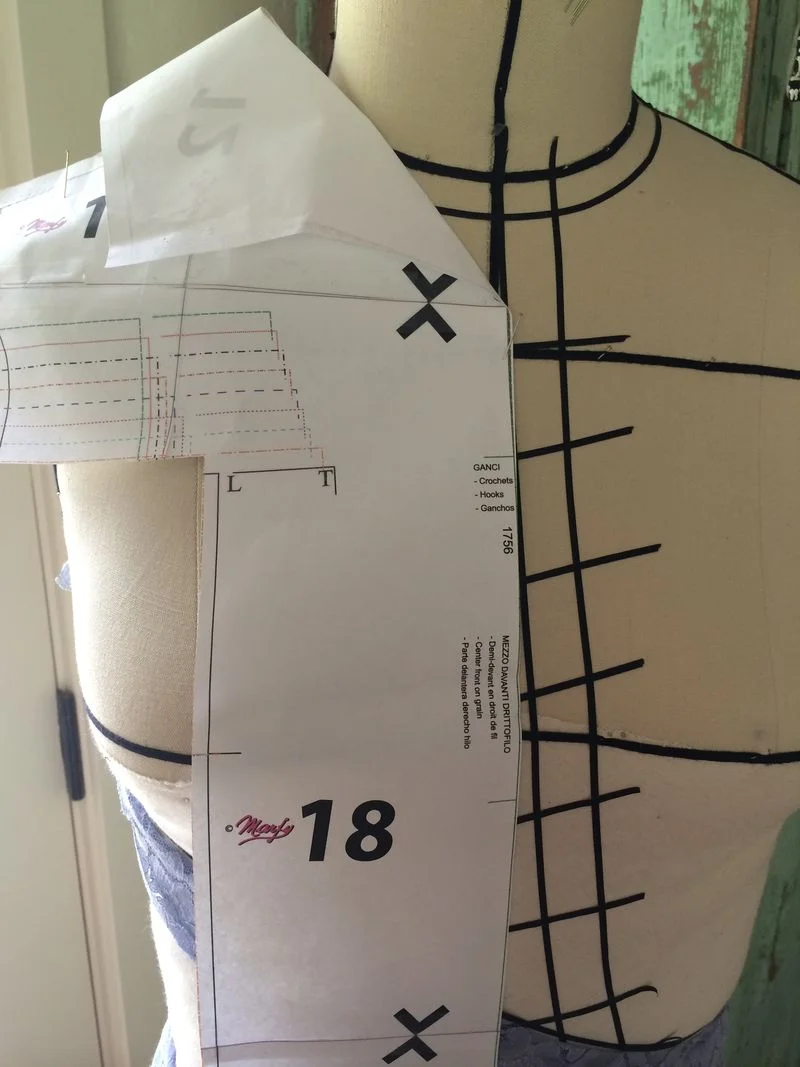
Marfy sew along 1756 Pt 10 - Pad stitched, machine sewn and fusible interfacings
We have finally reached the construction stage, now the fun begins!
So, what is an interfacing and how do we use it here?
Simply put, its an additional layer fused or sewn directly to the wrong side of a garment to add strength and support to a section of fabric.
Without interfacing, a jacket front could not support the weight of the collar, or hang correctly from your shoulders, a collar would collapse, cuffs in a shirt would be limp, a waistband would roll.....
There are a few ways to interface a tailored jacket - custom tailoring, fusbile tailoring and a mix of the two....
and as this post is huge, I am going to break it into three parts.. one a day..
a) Interfacing, and how to attach it to your front panels
b) Sewing the roll (break) line and applying twill tape to the outer edges
c) Pad stitching the collar section
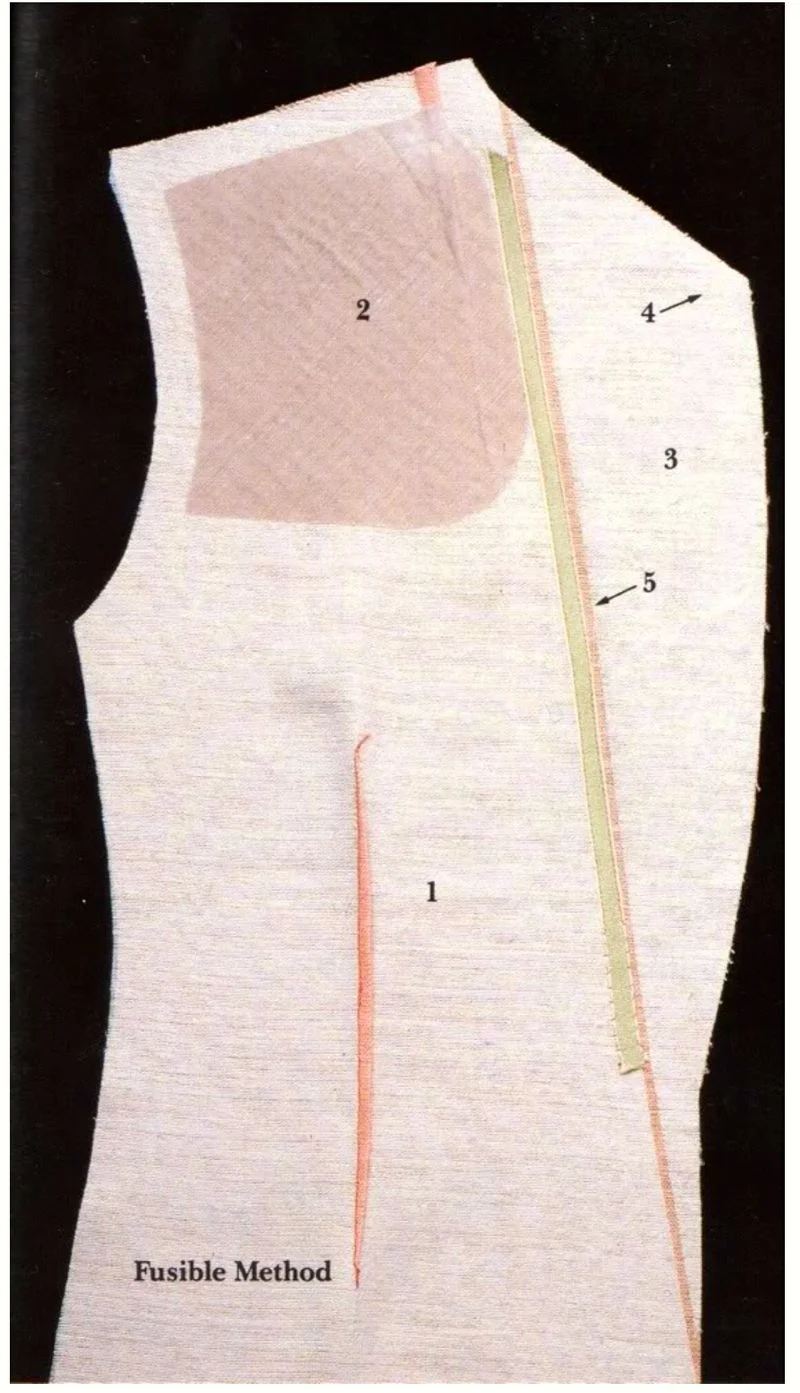
FUSIBLE TAILORING
The fully fused method includes a single layer of fusible on the front (1)
A double layer of fusible on the lapel (3)
Removed darts and roll line sections
A machine sewn reinforcement (2)
and a partially machine sewn/hand sewn twill tape (5) on the roll line.
(spot the slight ease about the bust dart? this will control any pulling)
MACHINE METHOD
The machine method incorporates traditional custom tailoring but uses a sewing machine to apply them rather than a hand stitch..
The front panel is hair canvas (1)
The hair canvas shoulder reinforcement has been machine sew (2)
The lapel has been shaped to allow for a gentle curve - spot the small excess (3)
The twill tape has been added by machine before being attached to the jacket and a simple running stitch has been used to join the two layers (4)
The roll line twill tape has been partially sewn on the machine and the last few inches sewn by hand - the underneath of the lapel will hide the machine stitches and the hand stitches are placed where the collar remains facing the right side (5)
(Notice also the slight ease around the armsye for comfort and shape)
TRADITIONAL CUSTOM TAILORING
Above is the hand sewn, hair canvas version of a tailored jacket.
The entire front is made from hair canvas (1)
The shoulder reinforcement is machine sewn but pad stitched to the fabric by hand (2)
The lapel has been pad stitched using a variety of stitching sizes to create weight and balance which allow for a gently curve (3)
A roll tape has been used on the outer edges to create a sharp crisp seam line, this has been sewn by hand with a double row of stitches.
The roll line has been sewn with negative ease so that the lapel will hug and not gape when worn.
(all three images courtesy of cutterandtailor.com)
Pick and choose what interests you, there is no right and wrong ..this should be a really enjoyable sew, it will probably take weeks (and weeks) and it should! but beware, its also very addictive.
For my jacket, I am going to be use the custom tailoring method so I can show step by step pics and although it takes some time, its actually lovely and simple, and yet looks incredibly impressive....
and don't forget what we are sewing is the women's tailored jacket not the mens version. So it will look a little different - less worked- than most jacket tailoring pictures available on the web.
A men's tailored jacket is much more intricately structured with a much harder look, while a woman's is much softer, gentle with a hint of drape..(unless you want to create that good time known as the 80's!)
and, if you find you are hooked, that you want to know and learn more, I would highly recommend buying Thomas Von Nordheims Vintage couture tailoring. I think its one of the best sewing books available, and I wish there were more to this standard, there is such a market for them....
He also holds some classes in London throughout the year, and needless to say, I am going to have to co-ordinate a visit home with one of those weeks in the future!
and for daily inspiration, I have been following a wonderful tailor called Sten Martin on Instagram thanks to Norma . (Take a look at his hand sewn T shirt pics - now on our list of makes of course! )
While I was finding the link to him, I just came across a whole series of You tube clips he's made, although most are on draping and not tailoring.
Andrew Yamato has a amazing series on Vimeo with master tailor Rory Duffy who makes a men's tailored jacket from start to finish...
and there is also a Steffani Lincecum course on Craftsy- Classic tailoring the blazer - which is getting some good review, and while I have not seen it, if you, like me are a visual learner it could be helpful.
PAD STITCHING and BASTING HAIR CANVAS
Pad stitching is a hand stitch used to join two layers of fabric together.. the smaller and more tightly spaced the stitches are, the firmer the padding...
On this jacket front, we will only sew two or three lines over the entire front panel, running parallel to the grain line...as this will help preserve the softer look.
For the collar, we will sew pad stitches parallel to the back collar seam to provide the extra support needed for it to stand, and towards the roll line we will sew parallel stitches to help build in a curve and some weight.
The only real rule to a pad stitch is that it should only be seen from the wrong side of the fabric. The needle should never go through into the outside of the fashion fabric, instead you are joining the layers by picking up a single thread or two of the fashion fabric before reaching the right side. Literally a thread or two of the wrong side of the fashion fabric...that's it!
(If you were to take the thread all the way through to the right side of the fabric, little puckers and bumps would appear due to the thread tension)
and as I previously mentioned here, you can either have your hair canvas running under your armseye or stopping before..
I think the shorter arms eye is the simpler of the two, so I am going to use that as my example...
To start - machine and custom method...
Before you start to sew, I like to draw some lines on my hair canvas to act as a guide.
You should always start by marking the roll line first (yellow)...this helps you to place the shoulder reinforcement in its correct place..which should be at least 1/4" away from the start of the roll line.
Then, pin your shoulder reinforcement on to your hair canvas front panel, leaving room for the roll line tape and using coloured chalk or a pencil draw lines 1" apart across the entire section (blue)
Using a 2.5 stitch length sew each line, back stitching at the top and bottom. When finished, I like to round my bottom edges so it reduces the chance of a ridge showing through from the right side.
Lay your hair canvas over your front panel roughly matching seams....and using very few pins, attach the hair canvas front to your front panel. Keeping it very loose.....you don't want this to pull your fabric underneath and gather it...
(I've sewn my side panel to the front as I think its clearer to see what I am doing in pictures, but if you prefer you can sew that later, when we sew the remaining seams)
You will be able to see if your hair canvas needs to be trimmed a little. It must finish slightly before the seam line begins (to reduce seam bulk)
Just trim all around until you can see your thread basting..if you are using seam allowances mark them on to the hair canvas and then cut.
DO NOT TRIM AROUND ARMSEYE, LEAVE HAIR CANVAS IT WILL HELP SUPPORT SLEEVE
Now gently pick your up front panels, and turn them to the right side or better still pin them to a dress from...check if there are gathers, lumps or bumps. If there is, re-pin the hair canvas until both are laying smoothly.
Again, the hair canvas needs to have a slight ease to it, and match the flexible nature of the fabric...don't pin it to tight!
Basting your front panels - custom method...
Flip your panels back so the wrong side is facing up and using a different colour chalk or pencil make a line, make a mark starting 2" from the top of the shoulder close to the roll (break) line almost all the way to the hem..
Make another line starting in the middle of the shoulder, and follow it down again to the just above the hem..
and make a third 1" to 2" before the end of your arms eye extension...
To baste, thread a needle with a single thread, and knot the end.
(I'm using black so it can be clearly seen but a colour slightly darker than your fabric would be better)
Turn the canvas so that the line is parallel to you (show above) and start to sew on the right side (unless left handed!)
Because I have a loosely woven fabric, I have made my stitches about 3/4" in length, but if you are sewing with a firm stable fabric, your's can be 1" on longer...
Do not pull your stitches tight, they need to sit on the canvas with a slightest of ease....you don't want to alter the look on the right side of the fabric!
A running stitch would also be fine here if you prefer , but I like to use a pad stitch as I find it quicker and neater...plus it kind of gets me back in the rhythm again..
Tomorrow we will sew on our outer tape and roll (break) line tape...
Friday will be all about the collar!
MACHINE SEWING
If you are choosing the machine method for your fronts, then today is nice and easy!
Follow the info above regarding the shoulder reinforcement and join that with a machine stitch to your hair canvas panel.
and for anyone interested in seeing what machine pad stitching looks like on a jacket, take a quick look at this Sandra Betzina jacket preview video.
Tomorrow, we will sew your tapes and join your panels to your fabric.
FUSIBLE
If you have chosen to use fusible this time, then we have a couple of things to do...
Firstly, mark your roll line on your fusible panel and then cut following that line, lay both pieces on to your fashion fabric wrong side to wrong side as shown in the photo above and gently iron them to fuse..
Press iron your shoulder reinforcement in the same manor and then cut a second collar peice (the smaller of the two you cut) and press that onto the first...
Craftsy has a nice little fusible tutorial, the hows and whys etc!
You tube also has some great videos, this one around the 5 min mark is helpful.
Tomorrow, we will be sewing your roll line on by machine..
Have a lovely evening everyone!
Any questions? Hellochallengingsew@gmail.com (envelope icon at top right) or leave a comment :-)