Marfy sew along 1756 Pt 8 - Hair canvas, fusible prep and roll lines
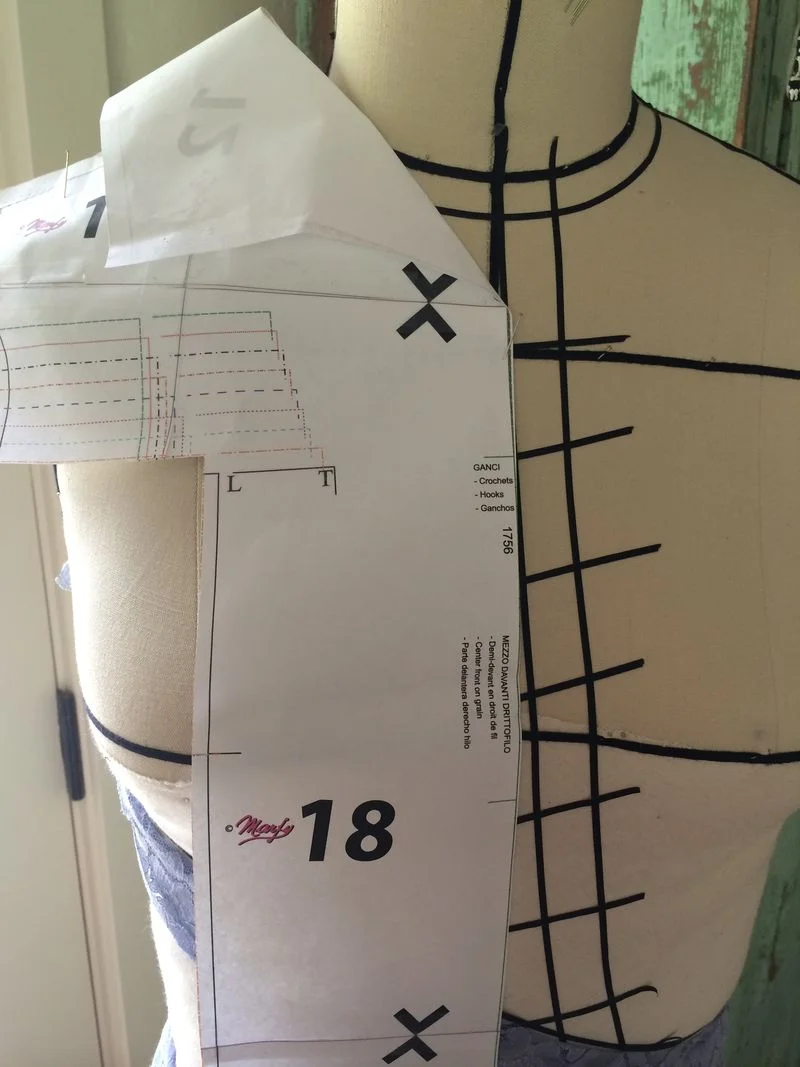
Before we start playing around with our pattern, we need to find our roll line so that the shoulder support we will be making does not overlay into this area.
Its not as obvious in this jacket, mainly because of the stand up collar BUT there is a roll line here, one thats going to need some help so that it turns gently outwards and does not collapse.
There are a few ways to find a roll line if its not marked on a pattern (and it's rare that it is) either by making a note on your final muslin, by placing the pattern on the dress form with the shoulder seam lined up or by pinning the paper pattern to you!
Its not going to vary to much from person to person once you have a pattern that sits well at your collar bone and is fitting well generally.
If you are making a more traditional coat or jacket, your roll line will be more easily identified at your lapel.. I made Marfy 3201 a while ago and it was marked on the front panel with a single notch at the top and bottom..
When you have marked your roll line as precisely as possible, we can move on to making a pattern for your hair canvas or fusible.
MAKING A PATTERN FOR THE HAIR CANVAS
I do a awful lot of reseach before I embark on a sew along, and one of the things I am constantly reminded of, is just how many different ways there are to do things...
When I first started sewing, I took some basic 101 lessons and was lucky enough to be taught by a fantastic costume designer in NYC....we used to buy sandwichs and he would sit with me at lunch and answer all my endless questions and draw me illustrations and instructions for all kinds of different techniques .....he was patience itself!
I still have the notes from when he showed me his way to tailor, he liked to run the hair canvas under the armseye for extra stability, and its a method I use often and love.
But, I noticed in the books I've been reading thats its not often seen or used, so I will also show a more common method that may look more familiar.
If you are not sure which method to use, I would suggest for the first time sticking with the more traditional method...there are definitely fabrics and patterns that do well with the extra shaping and some that are better with less... and the more times you tailor the more intuitive this will become..
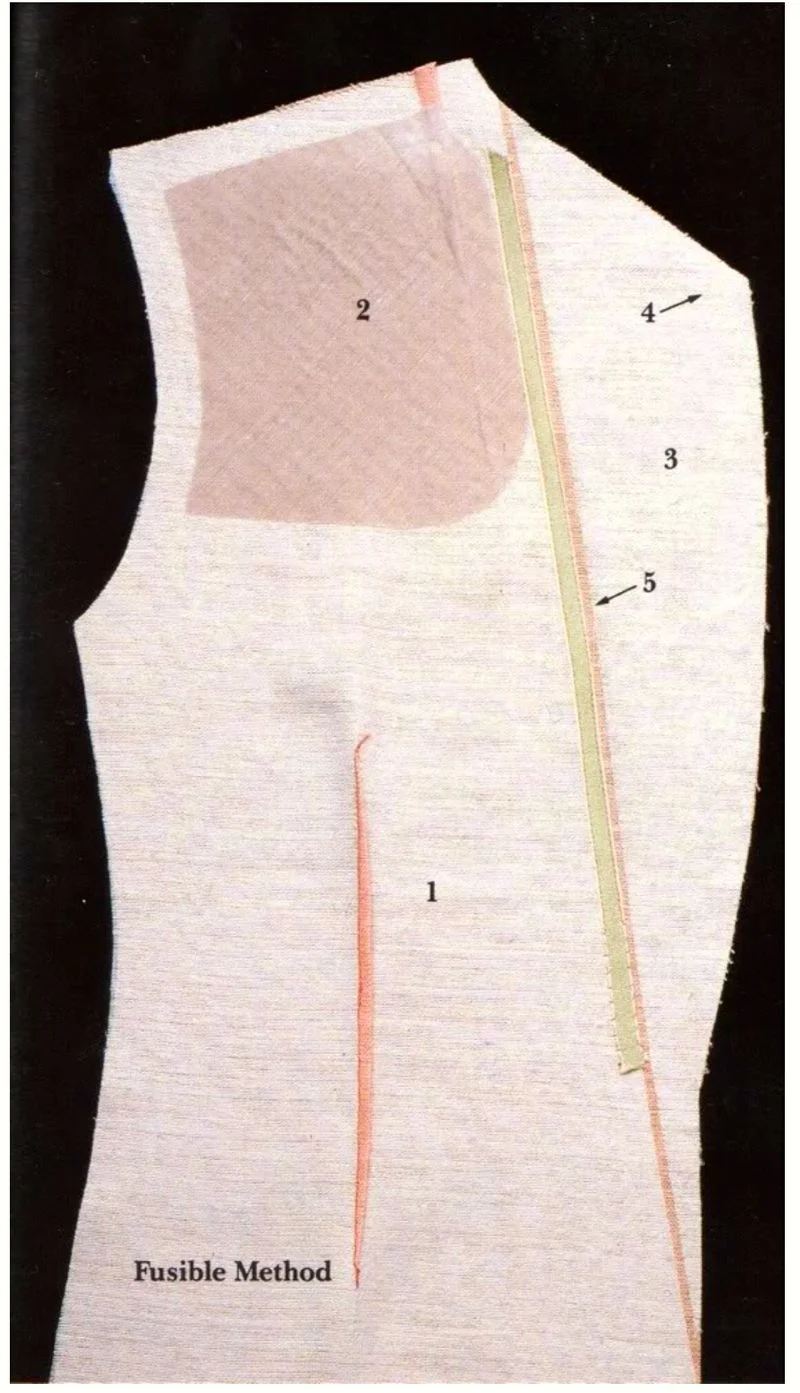
CUTTING YOUR INTERFACINGS
If you prefer to stay with the more traditional method *do not* add the side panel to the pattern, only use the front and insert front...
When making a pattern for interfacings, your main objective will be to keep bulk to a minimum.....cutting individual panels and joining them together with seaming adds layers to your jacket...
The easiest way to avoid this is to join the garment pattern together temporarily. As we are only using the upper part of the front side and side panels, match the notches at the top only (the pattern won't fit exactly as there are some curves to navigate)
As you can see the whole front panel will be cut but only the upper portion of the side panels...
Under notch N measure down approximately 6 - 7" and under notch L measure down 4 - 5"...
Using a French curve or similar, join this line in a gently sweeping curve similar to the back stay adjustment. (green line and don't forget the whole front panel will be included!)
Then using carbon paper or a pencil, trace around your shape making one whole pattern (do not add seam allowances, and if you are working with them included...remove them before or after tracing.
You should be left with a pattern that resembles the one below..
and the more traditional pattern will look like this:-
Use either of these pattern to cut out two of your hair canvas or fusible, and don't forget, while there are no grain lines on fusible, there are on hair canvas!
Line the grain up exactly to the selvedge as we did with both the fashion fabric and underlining before cutting, as the canvas has to stay on grain in order to work well with the fashion fabric.
SHOULDER REINFORCEMENT
and for the final step!....
A shoulder reinforcement is an extra piece of hair canvas that joins to the front chest and shoulder area is to ensure you have a smooth line from shoulder to bust...
To make a shoulder reinforcement, measure 1/4 - 1/2" in from inside shoulder and all the way down to the bottom of the amseye..
Do the same on the opposite side, taking care not to go within 1/2" of the roll line...then use a French curve to join the lines .
Use carbon paper, a pencil or a tracing wheel to make your new pattern piece.
This pattern must be cut on bias in order for it to not only lay flat but to help shape to your body.
On Monday, lets join our two front jacket panels together and talk about balanced darts (if you are using a different pattern) ... and Wednesday we can begin pad stitching, fusing or a mixture of the two..
Any questions? Hellochallengingsew@gmail.com (envelope icon at top right) or leave a comment :-)
Have a lovely weekend
Leisa