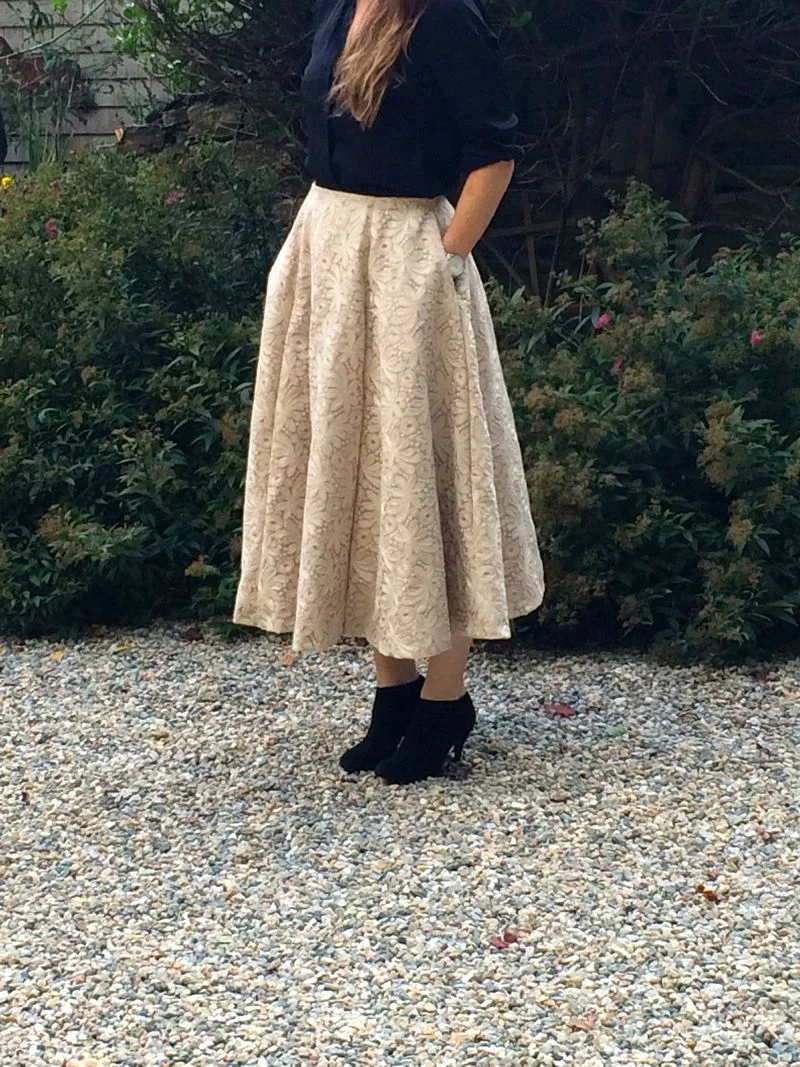
Marfy 1756 - a hybrid LFJ
There was some actual real live selfless sewing going on this week in my sewing room!
and while I won't say I will be doing it that often, it occurred to me that I should probably be doing it more...
Because, I just don't practice fit anymore and fitting someone else is interesting and fun.
I can't tell you how many times I've found myself in front of a mirror over the years, trying to fit a muslin that does not look "right" adjustment after adjustment that just made it look more confusing , twisting to see the back and shifting the whole garment off grain...looking down and pulling the back up, looking to the side and seeing drag lines appear and eventually becoming so frustrated that "good enough" was fine.
But, I've realized that I've been taking the easy route for the last couple of years, Marfy fit me almost straight from the packet which I love, I stick mostly to a silhouette I know works and when all else fails, I take any tricky complicated muslins to Baltimore for Susan to fit!
But, I found last week, that having someone in front of me that I could slowly fit from shoulders to waist was fascinating, and it made me wish that fit and fitting had been better explained to me when I started really getting into sewing. I don't think its a very intuitive thing for most people, I certainly had no idea how a well fitted garment should hang, behave and ultimately look for a long time and that certainly added to my years of frustration and sewing failures...
Because, truly there is such a correlation between sewing and fitting, that it should really go without saying that one won't work without the other.....
Although I am not sure which should come first, principles of fit or learning to sew? ......
but, until you see the correct placement of a princess seam, or learn how to adjust a shoulder seam for a rotation, a back for a sway or dowager...or even fit a waist so that it sits correctly, how can anyone with all the technical knowledge in the world sew a well fitting garment?
and while I would by no means say I know much, I have had the pleasure of being encouraged to sit in class after class in Baltimore and watch Susan fit muslin after muslin....and it occurred to me last week that this should be beginner 101 for any sewer who is learning to sew straight lines and thread a bobbin.....
Sadly, there appears to be no magic formula, and as one adjustment affects another and another....it will always be a case of working methodically through the muslin repeatedly until you get the desired fit, learning garment by garment, body by body, pattern by pattern, how to keep grainlines straight, when to add a dead dart or regular dart and when its ok to move a seam.
So while my Mother in law left with an actual garment, I came away with the realization that sewing for others needs to be far higher up on my priorities, because whilst I am a huge advocate of selfish sewing (how can anyone else be expected to understand just how much work was involved, I mean really?!) selfless sewing is critical to (my) growth.
and so, with what appeared to be excellent timing, when the middle daughter asked again last night if I would help her make a Ziggi Style Arc jacket over the next couple of months, I stiffled the urge to tell her about my overwelming sewing list and instead said sure ....and then offered to make one with her so she could learn do some fitting on me :-)
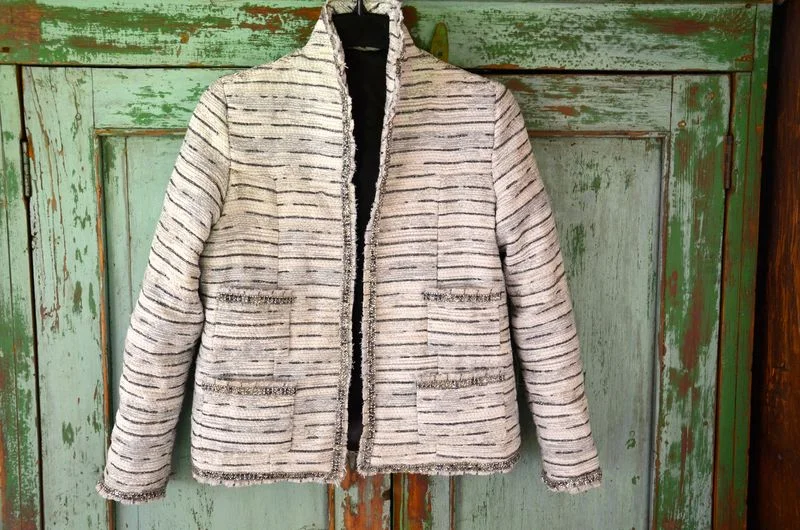
Marfy 1756
Oh yeah!
These are my thing. If I had to choose only one garment I could sew for the rest of my life it would be LFJ's... but, I have sadly reached the point where I just can't justify making anymore for me....so instead on the day after my Mother in law arrived last week, we headed into the city and down to Mendel Goldberg where I set her loose on the boucle and silks!
She picked a very stable multi coloured medium weight boucle that was nice and lofty and a lovely dark blue thick silk for lining...
then, after a quick stop to M&J trim for buttons, ribbon and trim we headed home..
and once there, I had her try on all my jackets so that she could get a feel of what style she would prefer, and she eventually settled on Marfy 1757 (the free pattern sew along - here)
So, while I won't bore you all with the minuate of this particular jacket again, I thought I would share some of the details from the week.
Muslins
I ended up making a couple of muslins, cutting the initial one based on bust size...because although my MIL is petite in height and frame, I knew a FBA would be needed, so I thought I would start there.
and while I did not take pictures of this process (awkward for a non sewer right?!) I did keep the muslin so I could mention some adjustments I included.
After increasing the width of the front princess seams to increase the cup size and reducing the back width and shoulder seams, I could see that there was a pooling of fabric above the bust and below the shoulder blade at the back.
Normally, this excess could be moved into a dart by lowering the extra fabric down to a desired point, and then by using it to create or add to a existing dart but as the boucle was bulky, a dart would have laid badly and added additional thickness to the sides.
A much easier solution to this problem is to use a dead dart.
Dead darts
Dead darts are a way of removing excess fabric permanantly in a muslin and are especially useful where a regular dart would be to bulky - say in a boucle, wool or thick cotton.
I've often seen Susan use them at a muslin fitting and I know that Kenneth King is also a huge fan of them....
While my MIL was wearing the second muslin, I opened up the smaller bodice panel seams and pulled up the excess, using pins to hold it securely...and then checked it was correct by pinning the remaining bodice back together again while she was still wearing it...
Then, I removed this panel completely from the muslin and using a sharpie drew on both sides of the pinned line to mark the depth of the dart.
before pinning it back together and marking a new armseye (pink)...
Once the muslin is altered it becomes a new permanent pattern piece.
Dead darts can be used in almost any bodice area when fitting a muslin, I created another in the back panel shown below with the same success.
*Just make sure that the amount of fabric taken away does not alter or shift your grainlines...if this should happen, split the fabric between two places if possible (or make a new grainline)*
Quick tailoring
Because this particular jacket has a collar, I knew some tailoring would be needed to support the front panels and neckline, but I was also very aware that in order to finish this in time, it had to be a fast version.
So, I winged it...and I apologise to any tailoring purists for the pictures below!
I've never had to tailor a jacket with a deep full bust before and was not sure of the best way, but reason told me that having a wall of canvas laying over the apex and full bust was going to look stiff and hang badly.
Instead, I cut the full front of the final muslin in hair canvas and marked the apex..
Laid the original pattern over the top and pivoted it, so I could see just how much I had increased the bust by...
and then I removed that middle section completely...
From there I pinned it to the garment and continued to cut up to the horizontal line on the center front panel (where the organza is used for the corner) keeping it parallel to the apex.
and made sure that the curvatures on the bodice were laying together before removing it from the form and laying it flat to sew.. it will look a little odd as the hair canvas will not lay completely down here....(I also placed the middle front seam over the hair canvas rather than below to reduce bulk)
A quick pad stitch, some tape and some catch stitching later..
and thankfully, the finished front hangs just as it should (the dress form is to small for the jacket unfortunately)
All boucles are not the same!!
This lovely boucle looked so mellow in the store, stable, lofty, easy to work with, non fraying...but it just about took me over the edge whenever it came near my sewing machine.
There are so many fibers weaved to create the colours and textures - silk, wool, acrylic, mohair....
and the silk was out to get me.
No matter what needle I used, it either punched that silk thread through the entire fabric or wrapped and caught it on the bobbin, jamming the whole casing.. every ten stitches or so :-(
Eventually, I found that adding some thin pattern paper to the underside (nearest the feed dogs) and sewing both layers helped enormously... I just tore the paper off when the seam was finished.
Quilting
There had to be quilting of course, the two back panels, sides and sleeves are all quilted hence the hybrid...it really is the best of both worlds I think, as the quilted silk is so luxurious and the tailoring helps the jacket fit and feel great.
Sleeves
While I don't have any pictures of the sleeve construction, I did do them a little differently this time and wanted to mention it.
The original pattern sleeves were far to big for the final sewn bodice so instead I had my MIL put the finished bodice on, and I pinned exactly where the sleeves should be sewn.
I then measured the circumference of this area and her bicep and adjusted the pattern to fit both..(one inch of ease in the bicep)
but no ease at all for the sleeve circumference, I kept the armseye and sleeve at exactly the same size..
and those sleeve's just slipped in at the first try, with small sleeve heads appearing organically and they just hang perfectly...
So, thats it for easing a sleeve in for me, lesson learnt. I completely understand that sometimes with a thinner fabric some gathering and easing can be aesthetically pleasing but for me, its just to stressful getting them all lined up and equal.
(and in the interest of time I did machine sew the sleeves in rather than hand stitch from the outside)
and thats about it..
The fabric selvedge, ribbon and trim were each hand sewn on individually one after another, my daughter made the pockets while I sewed the lining and I finished the last hook and eye twenty minutes before the MIL left for the airport.
and while I can't say, I will be trying to ever make another LFJ in five days again...it was kind of cool to know I can get one done that quickly!
Have a great week everyone, I'll be back on Monday with a finished (?) guipure dress!
Leisa