Baltimore with a slight nod to McQueen - Part 1
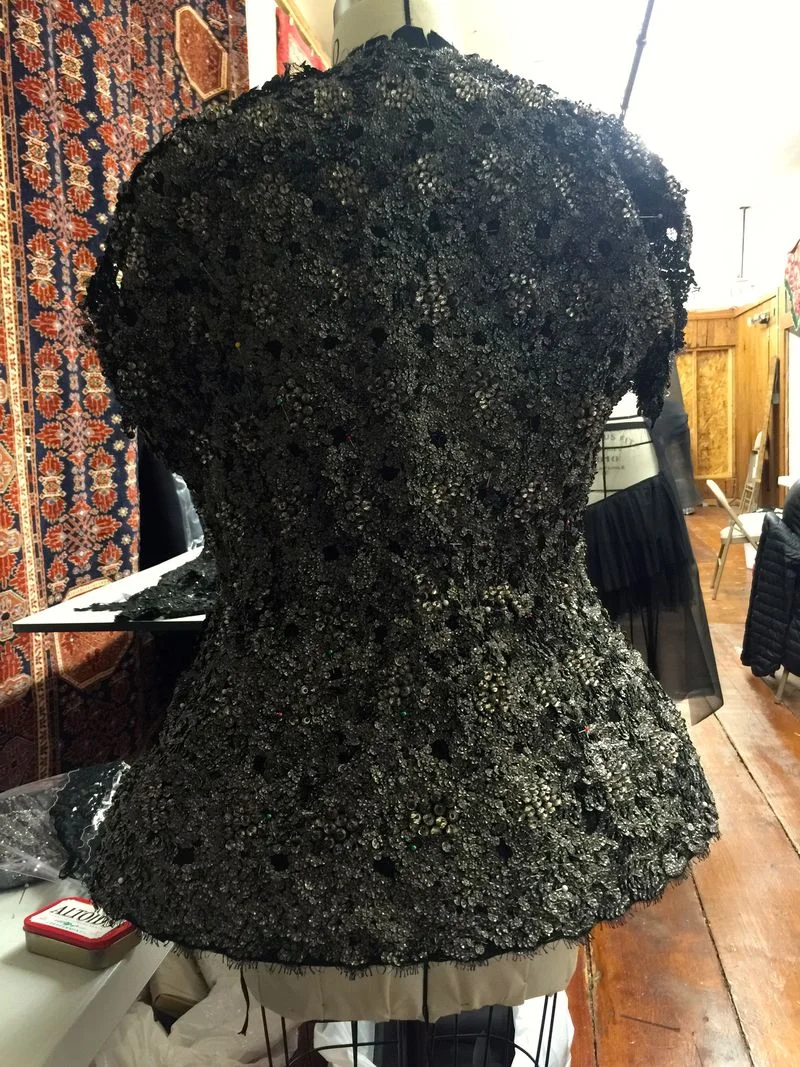
When I saw this lace at Mendel Goldberg a couple of years ago I fell instantly in love. It’s not nothing i’ve ever seen before....its dark, moody and interestingly visual, and it screamed McQueen to me, but I had no idea what I would make should I ever buy it and so it sat in Alice's office for more than a year just waiting for me to decide (she is really really amazing like that!)
But when Alice told me she was coming down to visit a Baltimore class I was in last September, I asked if she could bring the lace so I could talk to Susan about the possibilities of making a jacket with it.
Technically it’s a tough make as this lace is couture all the way - entirely sewn by hand, delicate, and incredibly heavy and only a scant 1 7/8 yards, 42" wide.
The wrong side
On the flip side, it's got no grain to respect so every single inch can be utilized by piecing, left over beads and paillettes can be added to fill in and hide seaming and it has the most glorious scalloped edges for hems and cuffs.
and thankfully Susan took one look at it, and thought a jacket and the lace would be a perfect match.
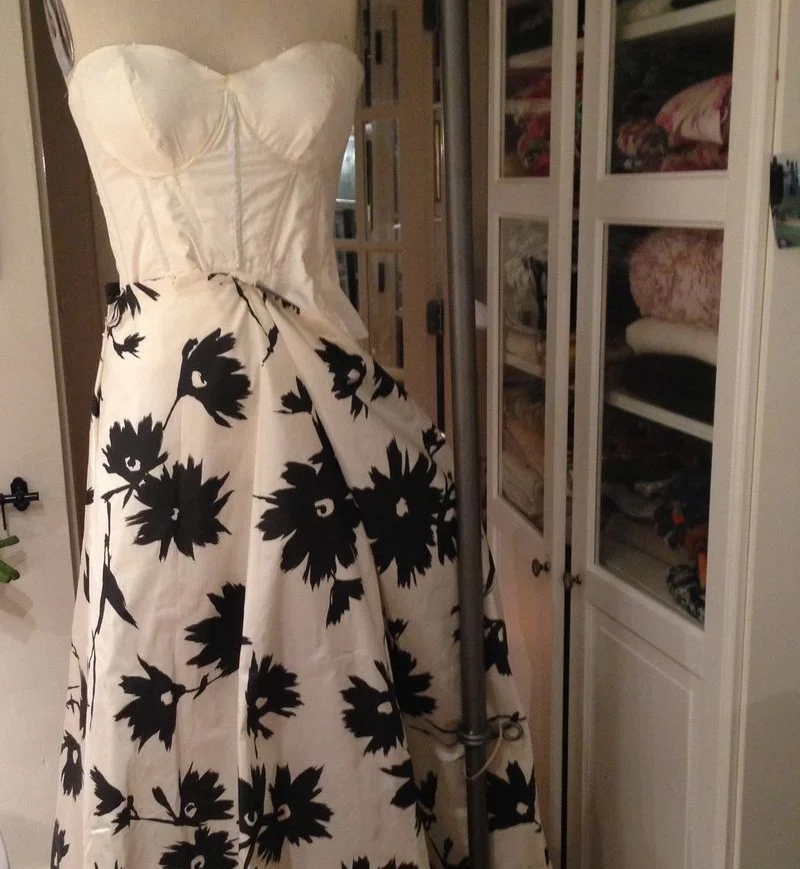
So where to start?.....I knew I wanted a basic jacket shape as a jumping off point and so picked pattern 3635 from the new Marfy catalog, I loved the lines and fit on this, and knew I could change the collar easily..
When I got to Baltimore, we talked about the muslin and did a quick fit, but the only thing Susan changed was the princess seam bodice dart to a side dart for sewing ease (and because it would ultimately be hidden anyway). There were some small fit issues but because I wanted this jacket super fitted and tight we decided to leave those until the base jacket was made..
I definitely came prepared with lots of options for the base jacket, as a few days before I left for class I had gone through my entire stash trying to find suitable fabrics and eventually settled on a really lovely super stable black cotton sateen...quite lightweight but firm with the nicest of sheens (which I hoped would show through the lace in places) my trusty roll of silk organza and a few yards of voile.
Susan recommended a double layer of the sateen, one cut on grain and one cut on cross grain as well as an underlining of organza to really provide the strongest most stable of structures to hold all that weight and shape we were planning on building in..
(By cutting the grains in different directions they all cancel each other out and provide a foundation that simply does not stretch or move on any grain - In the exact manor as Madame Picco who made her corsets with layers of alternating grained organza...)
Its a pretty hardcore base as in total I used 7 yards of black cotton sateen and three of organza and included very generous seam allowance everywhere for fit adjustments in case we needed it as construction progressed...
and I'm so glad I did because the first thing I realized when I tried it on was that it needed a little flare below the waist for visual interest, so I opened up each seam and added an inch to each throughout the jacket from waist to hem...
and once we had that, the fun began....
We realized that there are only so many ways you can support a peplum of that size and intended weight....and as fate would have it I was sat next to one of the most innovative and inspiring designers I have ever met, the very lovely Agnes (just take a look at her site - it's extraordinary) and she had just happened to have bought 36 yards of both 3" and 6" horsehair with her.
and so after a quick trade, I had seven yards of 3" horse hair to play with! I cut the trim into three 2 yard pieces (the length of my new hem) and saved a yard for shoulder pads.
Susan suggested sewing the three 2 yard pieces together to make one seriously strong support using a regular stich and a zig zag design...
Before sewing it into the hem of the bodice with a straight machine stitch.
Which resulted in this....
To cover the horsehair on the inside, I just flipped up the hem and sewed it over the trim with a catch stitch.
and then we had to decide how to distribute the weight of the lace most effectively to stop it from pulling too much on the shoulders and bodice......and the easiest solution seemed to be to attach the most snug of waist stay.
So while I wore the jacket, Susan pinned a grosgrain ribbon as tightly as she could around the jacket, gathering excess fabric as she went...
and I think that's what I really love about these garments, you can get really down and dirty with techniques....because the black fabric was all to be covered, I could just sew the tucks, and gathers to the waist stay as I went, not having to go in and finely tune the fit...and the lace would just sit on the top right where I put it...
(I did make sure that no pattern piece was twisted and the front grain remained straight when the jacket was closed but other than that it was a free for all!)
The stay was sewn to the outside of the jacket just because I could... using a small 1.8 stitch at both top and bottom to make sure it was secure.
and finally, on day three it was time to play with lace, and that I gratefully handed off to Susan!
The only thing I knew I wanted was the scallop at the hem, so once that was pinned all the way around, it was time to drape that lace.
It's fairly magical watching an expert do this I admit.......and something I could watch agan and again.
Susan basically pulled up the lace from the hem to the shoulder and pinned it roughly down, and then began to drape and manipulate the lace all around the bodice, gathering and pinching out sections with pins, and then cutting and snipping until it lay almost flat.
She had to use my big Ginger scissors to do this, as nothing else was cutting through all that beading and bits were flying everywhere...
and then I spent the next couple of days roughly stitching the lace to the jacket base before working on the shoulders...
I knew I wanted big statement shoulders, as a visual element to balance the wider peplum but without heading into Michael Jacket circa 1980, and the easiest way was to join what eventually became nine layers of horsehair to make a big enough pad as a base before wrapping the end in boucle to soften and build up that sloped edge..
and from there I trimmed and snipped away until I got a shape that I was happy with...
Realistically, I am in for at least another week of sewing, as its a slow slow process, I've made the collar and the sleeves are on, but it's tricky as the only way to mould the lace properly is to keep the jacket on the dress form, so I'm spending a lot of time standing, crouching and hanging off a chair trying to sew.... and I'm finding I can only do that for short spells before my mind wants to explode!!
BALTIMORE PROJECTS
One of the most fun things about these classes is seeing what everyone else is making, and they are always so generous about letting me take pics to share.... and while I didn't get everyones garments again -sorry! (I always feel a bit intrusive taking photos while people are sewing/fitting etc) there is a nice selection below.
Diana and I have taken a few classes together now, and she is one of them most advanced and skilled sewers I know..
She was making a dress for her Sons wedding this year with a Vogue pattern that by all accounts more than deserved its advanced rating!!
and working on the wrap to complement the dress...
and the very lovely and generous Eileen (who some of you will know from Susan's Houston classes) was making Marfy 3467 in a gorgeous Chanel Boucle ...... thank you again for the fusible and hair canvas!! x
The amazing Agnes spent the week draping, designing, pattern making and sewing this extraordinary organza dress/coat that was to be worn over a corset and leather pants.. I wanted this so much..
Diana was using Burda 9746 as a jumping off point for a jacket...
and an extraordinary fabric that she bought at Mulberry Silks in NC...which believe it or not was even more stunning in real life.
Peggy was using Marfy 3451 to make a lace top from the dress pattern, which I thought was a really great idea to get more use from a single purchase.....
and she had the most wonderful piece of vintage cotton lace in the deepest shade of bottle green that I have ever seen..
and Andrea was sewing a vintage Pucci for her sons graduation this year...
The lines on this pattern were simply beautiful and I admit to being very tempted to make this.... Andrea also bought a beautiful boucle from Alice to complement the dress fabric for the little Pucci jacket.
and a couple of show and tell pieces that some ladies bought with them...
Some incredible hand beaded French lace being hoarded in stash for just the right occasion..it was only about 18" wide and about a yard and a half long, can you even begin to imagine how long that would take to create?!
and a wonderful idea for a quilted princess seamed skirt. This has all the same elements, full quilting, two back zippers etc but the boucle has been fringed at the bottom to great effect (apparently it takes a lot of patience!!)
Have a great week!
Leisa